
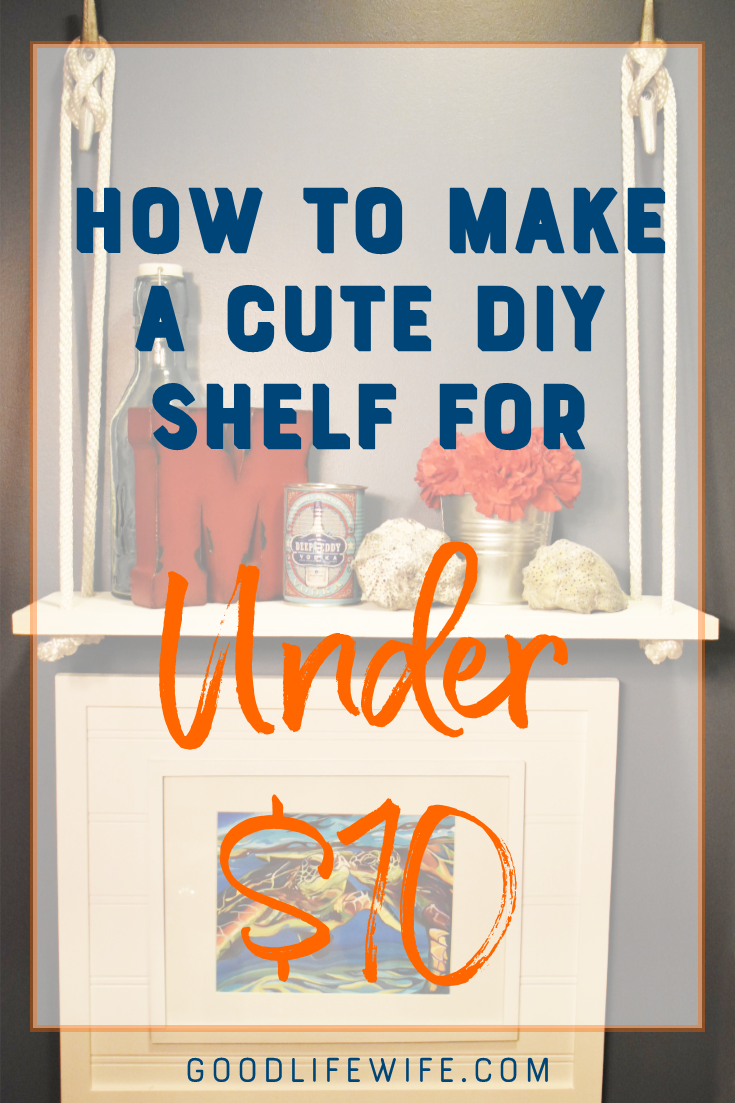
 This project was so fun and easy! Most of the materials were already in our garage, left over from past projects. The only thing we had to buy was the cleats, for $3 a piece. This cute nautical shelf was also super fast! We started after lunch and finished in time for happy hour. Not too shabby.
We bought these pretty prints at a local art fair. The artist turned out to be a friend of a friend and she is amazing! You can check out her work here.
My downstairs powder room is painted a pretty blue and these prints are perfect with it. After I got them home and in some frames I bought on sale at Michael’s, I wasn’t quite sure how to hang them. With one vertical and the others horizontal, it posed a problem. After messing around with them, I decided that I would arrange them gallery-style, in a square with a cute shelf in the negative space. I had my husband go ahead an hang them so I would be motivated to find said shelf.
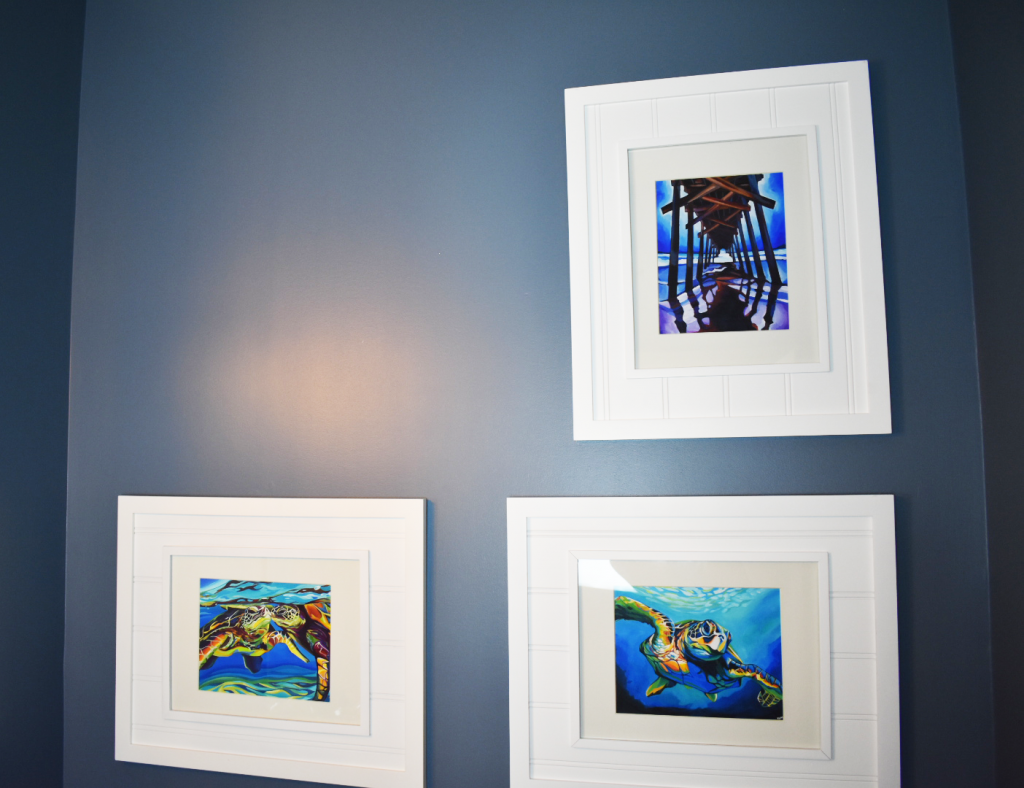
And it hung there with a big empty hole for a year. Nice.
This weekend I had enough and we hopped on this project. I shopped our garage and came up with a board left over from the closet project. John had some rope coiled up too. All that we had to buy was the galvanized cleats. Quick trip to the hardware store and we were in business!
This post contains affiliate links. If you click on the link and buy something, I will receive a teensy commission. Rest assured that I will not recommend something that I would not use myself. For more information, please see my disclosure page.
Here’s what we did…
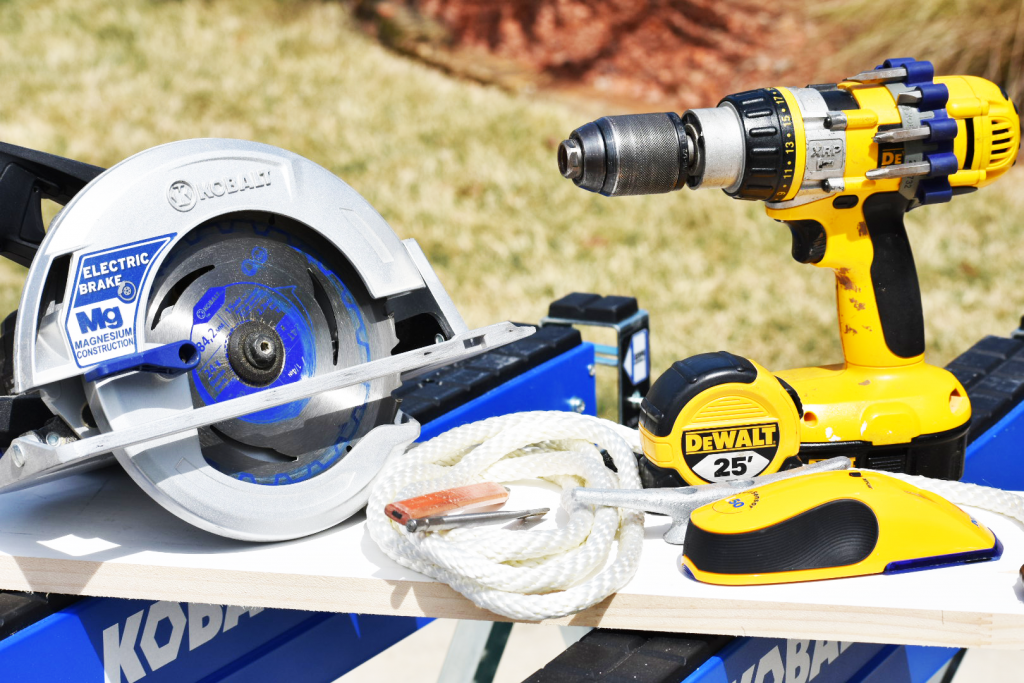 Materials List
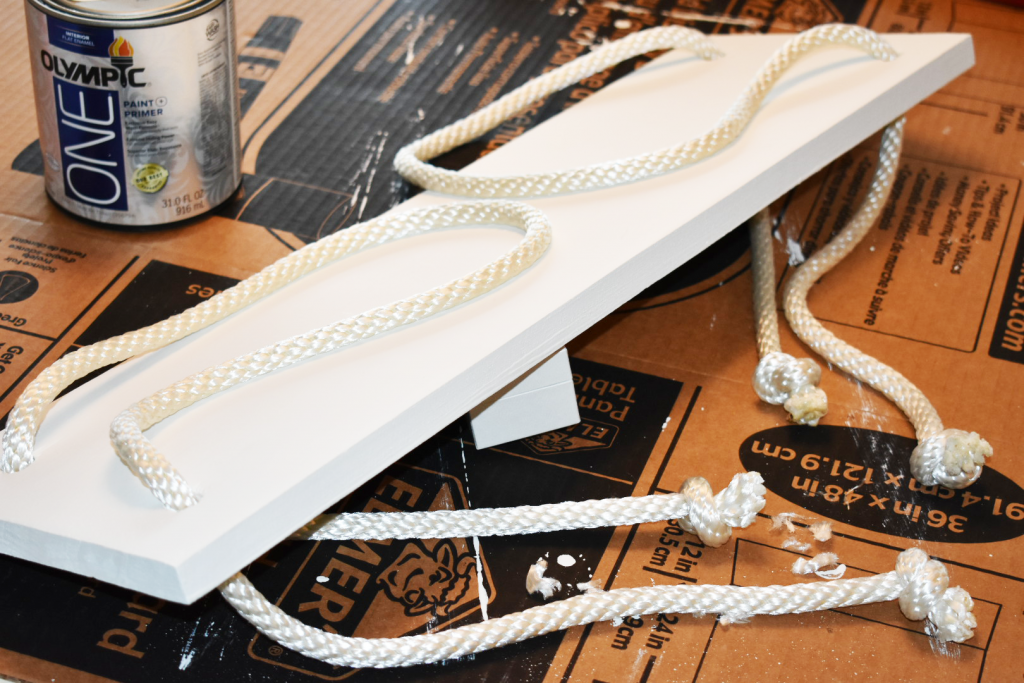
- 1 x 6 x 24″ board
- 10′ of rope (we had some left over)
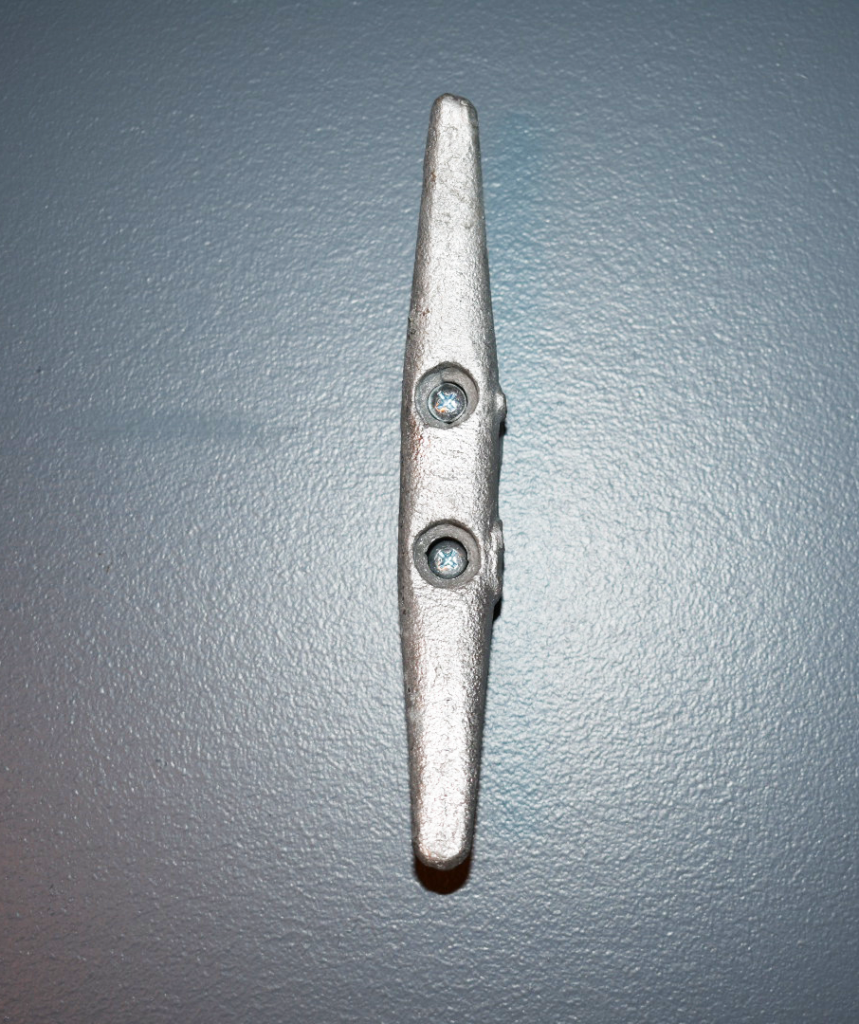
- 2 – 6″ galvanized cleats (like you would use for a dock)
- 4 screws with anchors
- paint
- sand paper
You will also need a few tools: a saw if you need to cut your board to size, paint brush, stud finder, tape measure, drill and 5/8″ paddle bit.
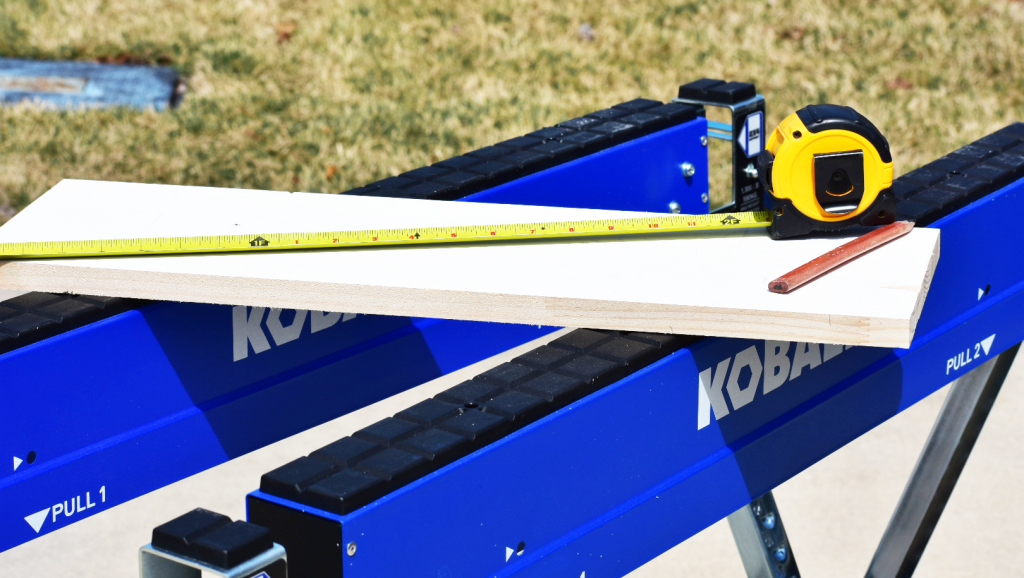
Step 1 – Measure
You’ll need to measure the space where you want your shelf. I wanted my gallery to look balanced, so the shelf and accessories needed to take up a similar visual space as the pictures. I tried to get all sciency and use the rule of thirds, but ultimately, I eyeballed it and 24 inches worked.
Now you’ll need to think about how long you want the drop between the cleat and the shelf to be. Again, I kind of guestimated that I wanted the drop from the cleats to be about 20 inches by holding up the board and a cleat in the space.
Step 2 – Cut Board to Length
If you’re not trying to use something you have laying around in the garage and you actually buy a board, you may not have to cut it. We (and when I say, “we” I totally mean John) cut the board to 24 inches with a circular saw.
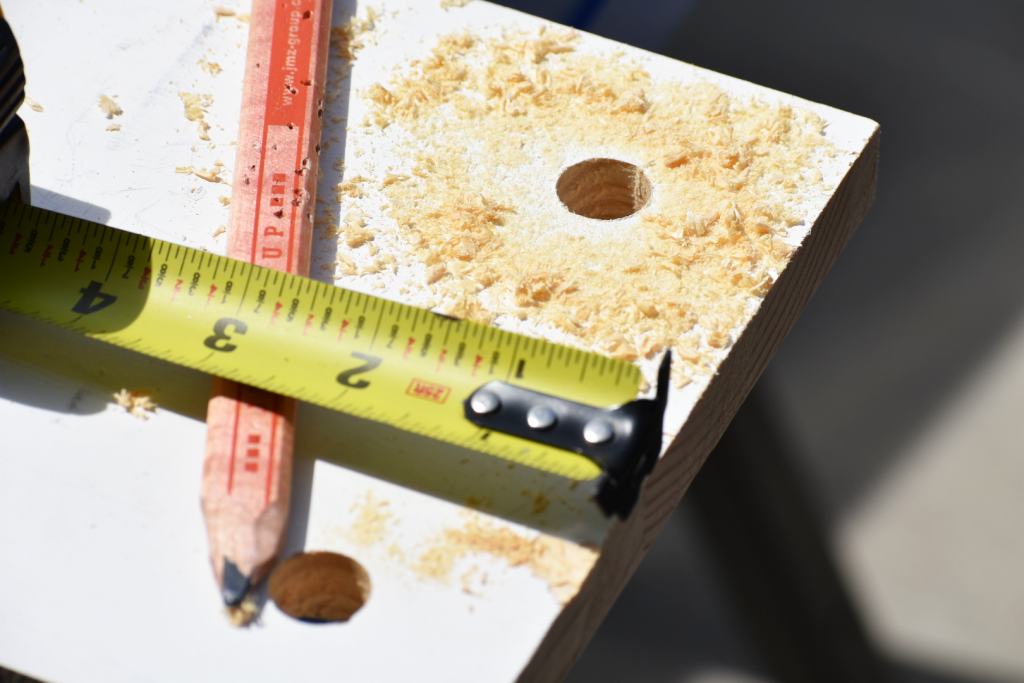
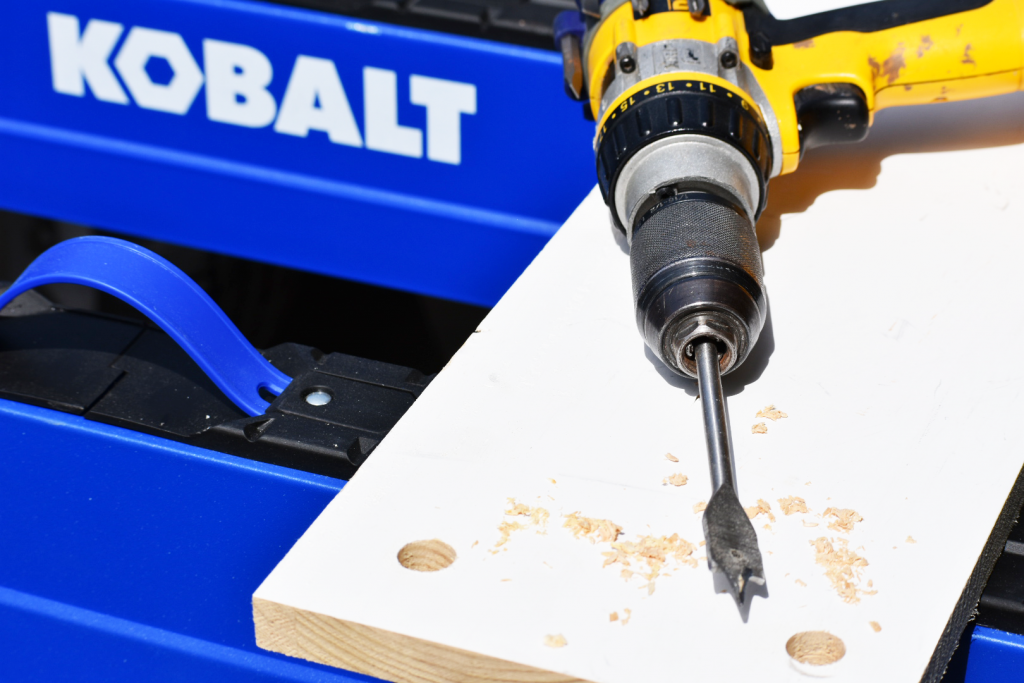
Step 3 – Drill Holes
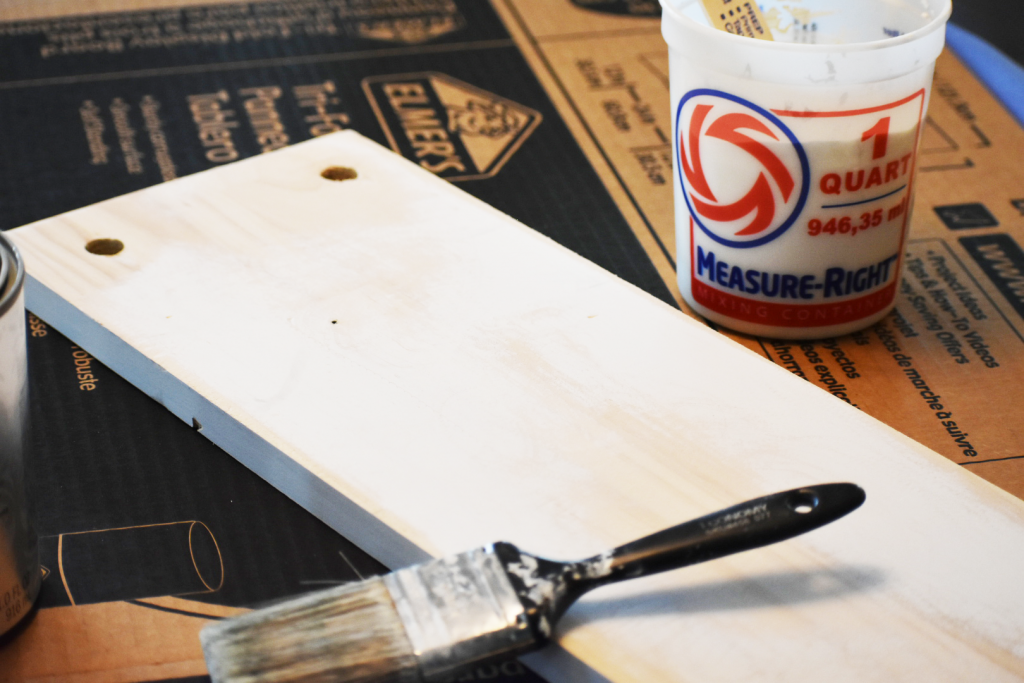
You’ll drill four holes, one in each corner. Mark the intersection of 1 1/2 inches from the end and 1 1/2 inches from the side for each corner. Put the point of a 5/8″ paddle bit on the mark and drill straight down so all of the holes will be even.
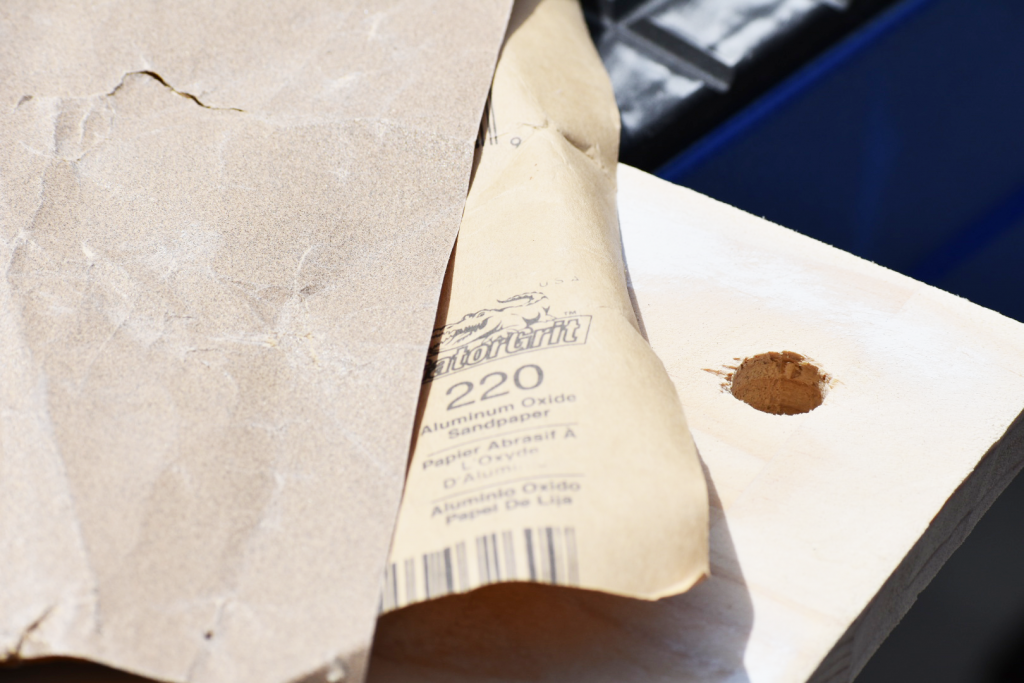
Step 4 – Sand
Use sand paper to smooth the edges and any rough spots on the board. We used 220 grit because that’s what was handy! I expected this to be a little rustic, so I didn’t spend a lot of time on this step.
Step 5 – Paint
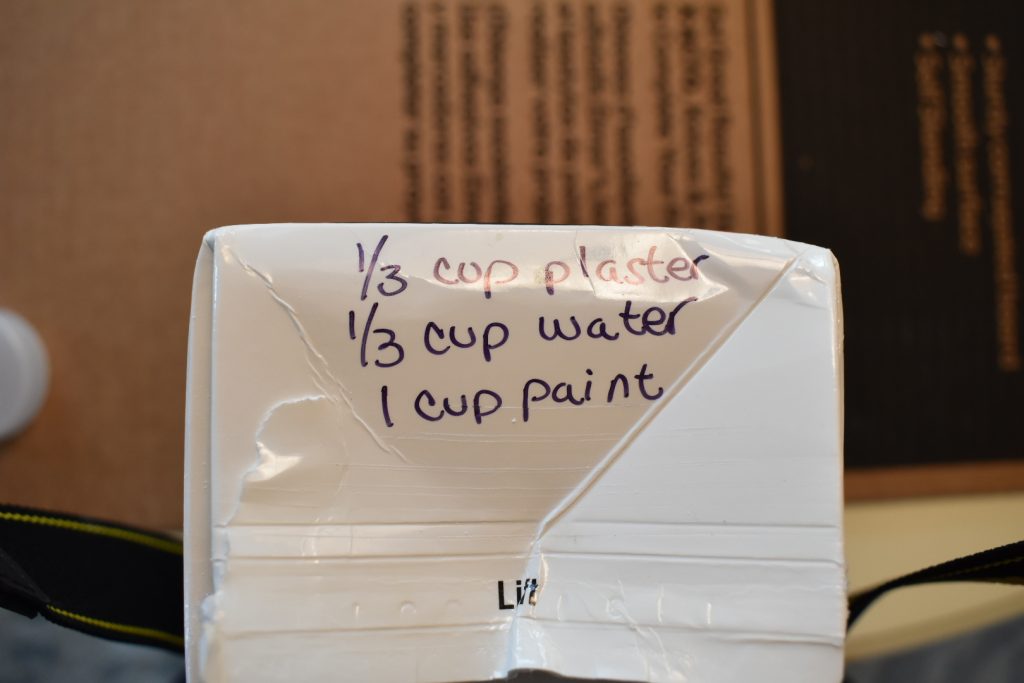
I wanted to use chalk paint because I like the finish and it dries really quickly. Two coats took about 90 minutes to dry.
I looked in my stash but didn’t have any white chalk paint but I did have some leftover latex paint. No problem, I just made my own chalk paint. Mix 1/3 cup plaster of Paris with 1/3 cup water and 1 cup of latex paint. I wrote the recipe on the plaster of Paris box so I would always have it handy. It didn’t take anywhere near a cup of paint to cover this little board, but honestly, I didn’t want to mess with trying to half the recipe.
Because this shelf won’t be heavily used, I decided not to even wax it. If it gets a little scratched up, it will just add to the look.
Step 6 – Install Cleats
This is the trickiest part. You need to get the cleats exactly at the same height. If you have one of the laser pointer level thingies, that would be super handy. We don’t, so I just held the level up to the wall and John marked the holes.
While the shelf isn’t heavy, those cleats are and it’s best to either screw into a stud or use a wall anchor. The studs are never where you need them for your decor projects, right? Anchors aweigh!
Step 7 – Add Rope
Remember back when you figured out what the drop between the cleat and shelf would be? That’s how you’ll know how long to cut your rope. I gave myself 40 inches (20 inches x 2) for the drop on each side, plus another six inches for wrapping around the cleat, and another six for each knot, so I cut two lengths at 58 inches (a little under 5 feet). Thread one end through each hole and knot. When you make sure that you have it at the perfect length, melt the ends with a lighter so they won’t fray.
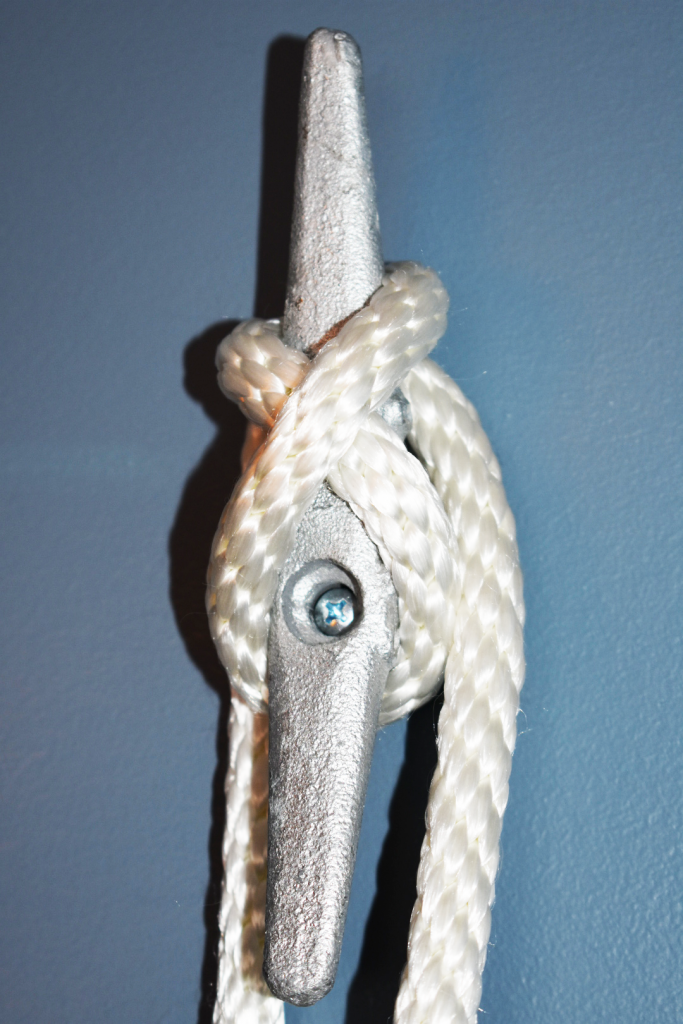
Step 8 – Hang Shelf
Wind each loop of rope around its cleat. You’ll have to mess with this a little and make sure you do both sides exactly the same so the shelf will hang level. Before you put anything on the shelf, check it for level and make sure it’s settled.
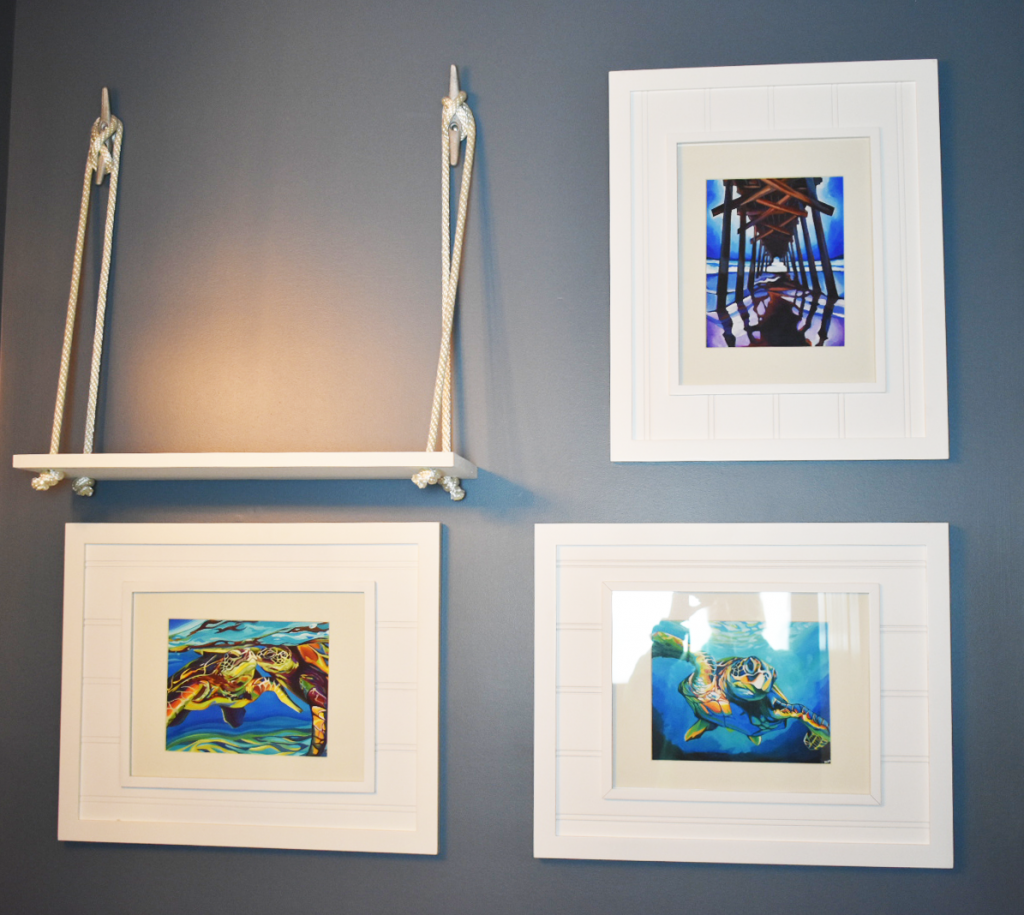
Add accessories and you’re done!
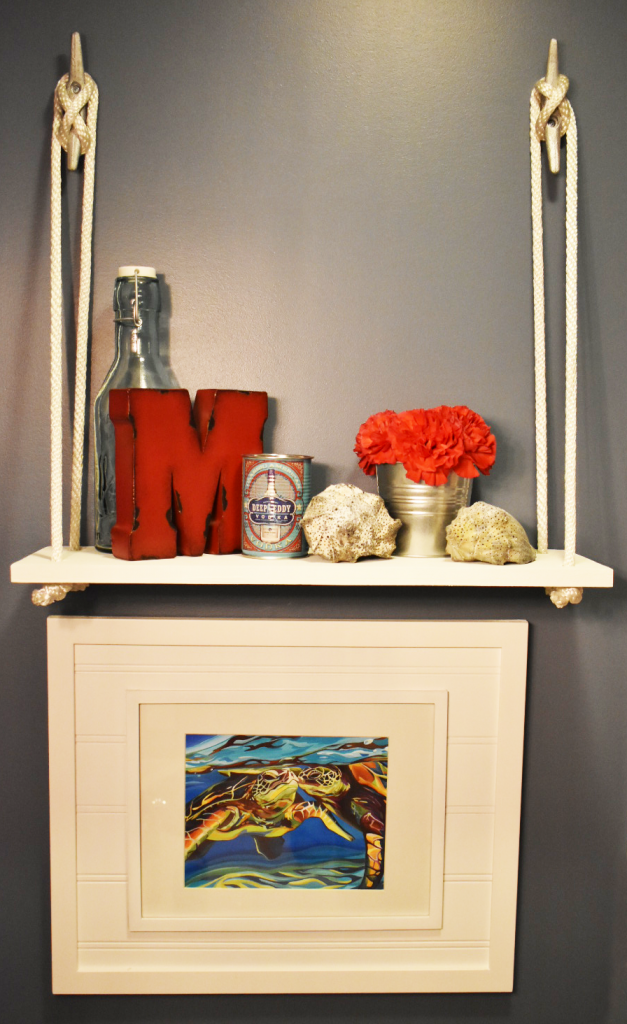
Now go have a cocktail and admire your work!
You could adapt this shelf project in so many ways. Use antique hooks instead of cleats for a more farmhouse feel. Ribbons and bows instead of rope and knots would be cute in a little girl’s room. These cleats come in even bigger sizes and are really sturdy so you could do a big shelf this way in an entry instead of a table. Oh, the wheels are turning!
Have fun with this project and let me know how it goes. I would love to see your photos on the comments!
P.S. Photographing a small room with no windows is super hard!


Looks lovely! Love those water prints too:)
Thanks! Her style of painting is so cool.
This is a really neat shelf idea! LOVE it! And, tell me about it… I’m in 10 x 10 rooms for all my photos! Ugh! 😉
I just subscribed, but I could have sworn I subscribed before! I would have been visiting your site each time (like you do with me… I appreciate you so much!), but I wasn’t getting notifications. Hmmm. I’ll let you know if I don’t hear from you.
Thanks for resubscribing! My newsletter goes out tomorrow, so let me know if you don’t get it.
Your topic was very help full. I believe that every body should be read it.
I am fascinated by your writing .I hope you will one day be a great writer.
This article was really helpful and informative! I’m glad I found it while searching for similar content. Not only does it provide helpful information, but it also includes practical images that I can use for reference. After reading it, I feel like I’ve learned a lot of useful tips that I can apply to my project. Keep up the good work!
Tools Detail recently posted…Best Chainsaw Sharpeners – What is the best one to buy?