 This post contains affiliate links. If you click on the link and buy something, I will receive a teensy commission. Rest assured that I will not recommend something that I would not use myself. For more information, please see my disclosure page.
Did you move into a house with a red dining room from 2001? Or does that amazing pumpkin shade you painted the laundry room remind you of a construction cone? Not to worry, you can change paint color with good prep, attention to detail and a little elbow grease.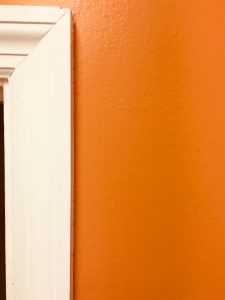
Preparation
All successful painting projects start with good prep. Whether it’s furniture or walls, the surfaces need to be ready to accept paint. I know you’ve only got the weekend and you’re dying to see the new color on the wall, but don’t skip these steps:
- Remove furniture. Take everything that you can easily move out of the room. It’s hard to maneuver around a bunch of crap, so give yourself a break!
- Cover. Use heavy drop cloths or construction paper on the floor. If one slice of the floor is showing, trust me, it will get paint on it! If you have to leave larger furniture in the room, cover with drop cloths as well.
- Remove any nails, picture hangers, Command Strips, etc. Take the outlet and switch covers off and keep them all together in a box or bag so that you don’t lose those tiny screws…or you’ll be screwed!
- Fill holes. Go around and fill all of the nail holes with a little spackle. For tiny holes, use your finger. Use a putty knife on bigger holes. If the spackle leaves a raised area, sand it smooth when dry.
- Clean. Dust walls and baseboards. Lint and dust sticks to walls and makes a rough surface when painted over.
- Skip painter’s tape. I know this is controversial and goes against everything HGTV and blue tape commercials tell you. But, unless you are actually painting patterns on the wall, you don’t need tape. Using it on baseboards and trim just makes a mess and paint always bleeds through. It’s also kind of expensive. Just get a new trim brush and practice a bit. It’s really not hard to get a good, straight line with a brush.
Prime Time
Most paint has primer in it. If you’re painting a light color over a light color, just buy the paint with primer and you’ll be good to go. If you’re trying to change paint color in a brightly colored bedroom, as I did recently (find out why here), primer is your best friend.
Agreeable Gray by Sherwin Williams is my newest paint crush. You may have read about my love for it before. I really just can’t get enough of it. Anyway, it’s a pretty light color and no match for teal and magenta paint. By using a primer first, it covered beautifully.
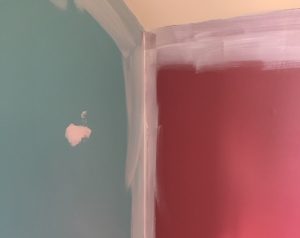

A few more reasons to love primer:
- It’s cheaper than paint. A gallon of primer is around $20 while a gallon of paint is around $35.
- Primer seals the surface, and a sealed surface needs less paint. It also can cover stains if you get Kilz or something similar.
- It can be tinted for even better results. When you’re painting with red, a white surface is really hard to cover. By using a dark gray tinted primer, I only needed three coats of red for the front door I painted recently while it probably would have taken six coats of paint with no primer.
Bottom line: if want to drastically change paint color, use primer.
Paint Party
Now it’s time to paint! You’ve prepped the room and primed, now you can get that gorgeous color on the wall. While I’m not a professional painter, I have painted many walls and miles of trim, so I know a trick or two. Here’s my system for getting this job done:
Cut In
- Pour paint into a cup with a handle and a magnet to hold your trim brush.
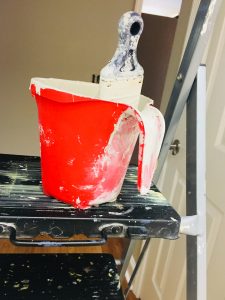 You don’t want the paint to dry out while your cutting in, so don’t just use a paint tray. If you don’t use all of the paint in the cup, you can pour it into the paint tray to roll later.
 - Practice with your trim brush a little bit until you figure out the angle to hold it to get a nice, clean line. I know it’s intimidating, but you can do it. It’s much less messy and expensive than tape.
- Using the trim brush, paint around all of the doors, windows, and outlets. Paint along the baseboard and ceiling. I do all of the sitting down painting at one time, then the standing up painting, then the standing on a ladder painting.
- When you’re finished, wrap your brush in plastic until your next coat. I use the plastic shopping bag that it came home in.
Roll Out
- Pour any leftover paint in your cup into a paint tray. Now pour paint from the can in until it’s about half full. You don’t want it to slosh over the sides when you put your roller in.
- Get the roller assembled with the brushy part. Use a roller with a squishy handle, your hands will thank you for it.
- Roll paint onto the wall, not getting too close to the trim or ceiling. That’s why you cut in, so you wouldn’t get paint all over the ceiling!
- I’ve heard several opinions on rolling technique over the years but I really don’t think it matters all that much. Just be methodical and always work with a “wet edge,” meaning you don’t skip around.
- When you’re finished, wrap up the roller in another plastic bag until your next coat.
This a good chance for a division of labor. My Knight in Shining Armor (holding a roller) usually comes in and rolls after I cut in. I’m more detail oriented and he’s tall so it really works great.
Cleaning Up
Ugh, this is the worst part. I do have a little secret though. I throw shit away. Pretty sure the brushy roller deals are disposable anyway. A trim brush is about $5 so if it’s in rough shape (or I’m super tired) I just toss it. The plastic paint tray liners are disposable too. I know it sounds crazy coming from someone who saves the gloves that come in hair color to use for painting projects to actually throw something away but by this point, I’m really tired. I just want to sit down in my grungy paint clothes and drink a beer. Hey, you just saved several hundred dollars by doing the painting yourself, so live a little!
What’s the craziest color you’ve painted over?





You’re so hilarious Kim! I hate the clean up part of painting too! My husband is the master painter around here, but when I’m painting he tells me the same thing. Just throw it away! NOW I know why it doesn’t bother him to paint room after room, after room. Ha!
Right? Even after all of the painting that I’ve done recently, I’m really not burned out. I’m kind of itching to start another project!
I think my hubby does a great job painting, but he doesn’t think so… That means I am always the one painting! However, he does use this little paint pad with wheels to cut in a straight edge and it actually works great… unless you get paint on the wheels!
I always got paint on the wheels! I’m kinda messy…
Love how you cleverly made the drop cloth cover washable! I’m sure your son-in-law will be thrilled with his new bench.
When it comes to painting your front door, there are a million colors to choose from but only one real option for the finish. Semigloss paint gives you a smoother surface than lower-sheen finishes and has a degree of shine, providing a visual contrast 🙂
Your all tips are easy and practical. Keep it up.
I love your blogs, which are full of useful information, but at the same time so positive and reflect your wonderful sense of humor.
All the best!
Thanks for such a helpful guide!
Am I the only person who has always been interested in finding out what people smell when they enter my house? Every house has its smell.
Here are some ways to make it pleasant and “cozy” for your guests and for you yourself:
1. Ventilate the rooms daily.
2. Change air conditioner filters regularly. Pros recommend doing it at least once every two months.
3. Bake cookies with cinnamon or other spices 🙂
Changing the paint color in a room can be a refreshing way to update your space, and Kim Mayo offers excellent tips to get it done right. Preparation is key to ensuring a smooth, professional-looking finish. Removing furniture, protecting the floor with drop cloths, and covering any larger items left in the room prevents unwanted messes. Paying attention to details like filling holes and removing outlet covers will give you a polished look once the new paint is on.
Painting Contractors recently posted…What is the difference between commercial and industrial painters?
Great guide! I think it’s especially clever to use signs to block out the sun. No one likes being blinded when they’re trying to shop, so this increases customer retention.
Revamping your room’s paint color is akin to dressing your space in a brand-new outfit! Choose a hue that brings you happiness, prepare the walls, and watch the transformation happen. Just a splash of paint can add a whole lot of character!
When shopping paint colors in most stores, they are displayed with fluorescent lighting. The colors look different in your home with incandescent light. Something to keep in mind.
This was exactly what I needed—very straightforward and informative.
To change the paint color in a room, start by choosing a new shade that complements your décor and lighting. Prepare the walls by cleaning and patching any holes. Apply primer if needed, then paint with even strokes. Hiring expert home painters can ensure a smooth, professional finish and save time. Let the paint dry fully before moving furniture back in
Light can also affect the way you see colour, whether it’s natural light, fluorescent, Incandescent or led (cool white, neutral white). Artificial lights project different wavelengths which can result in a colour that looks different.
To change paint color in a room, start by choosing a new color that complements your decor. Prep the walls by cleaning and repairing any damage. Apply primer if needed, then paint using smooth, even strokes. For tools and materials or professional help, click here. Let each coat dry completely before applying the next for best results.