
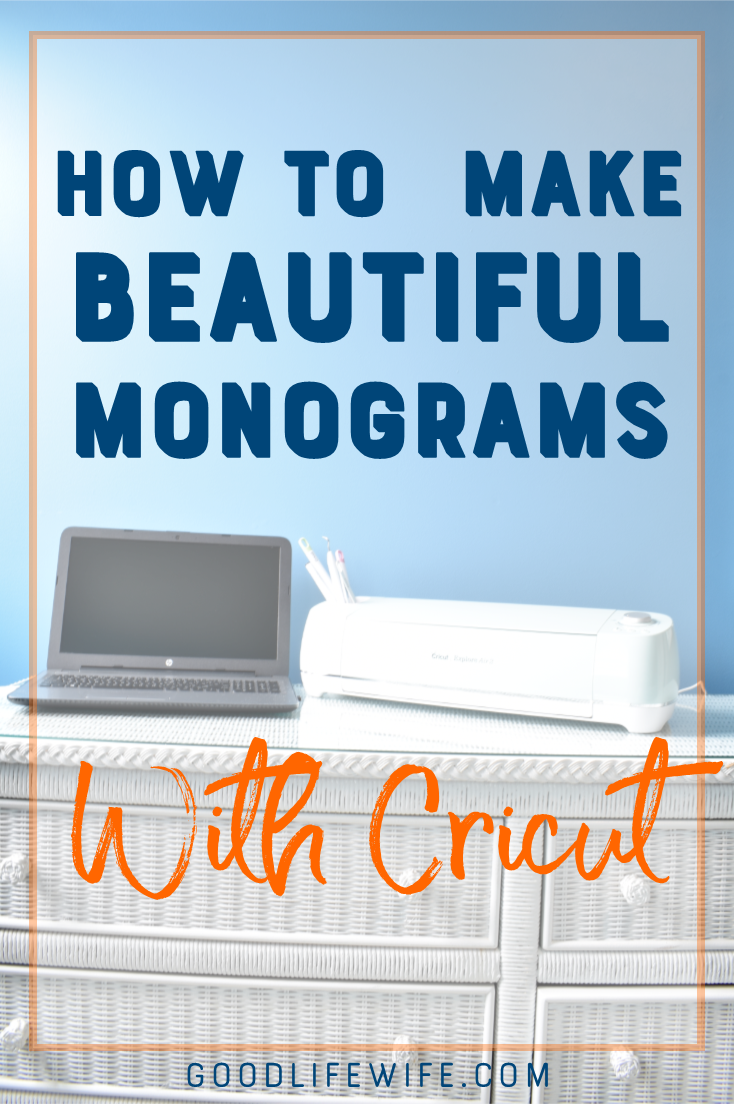
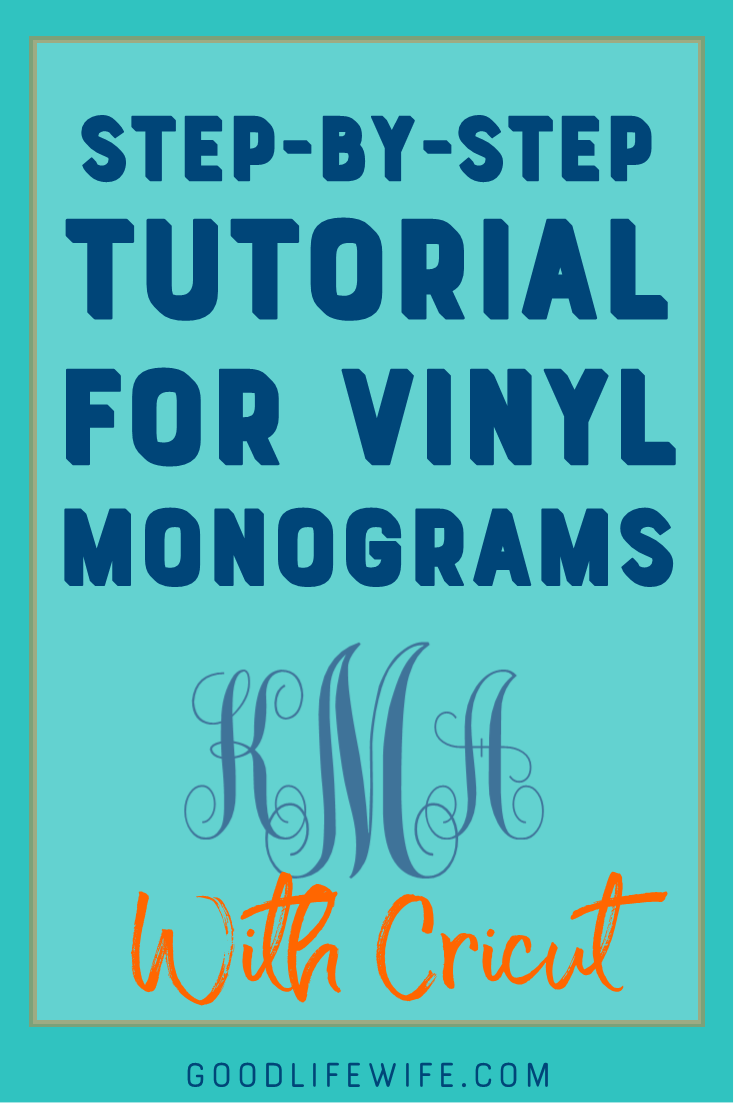
 Are you obsessed with monogramming? Me too! I just love to add monograms to all of my stuff, my daughter’s stuff and possibly even my dog’s stuff. My husband gave me a Cricut Explore Air 2 for Christmas so I could do all the things. Is he good or what?
The Cricut is pretty easy to use, but there are still some tips and tricks to getting your monogram just right. How about if I save you the trouble of searching the interwebs and give you a step-by-step tutorial on designing and cutting basic monograms with Cricut? Perfect!
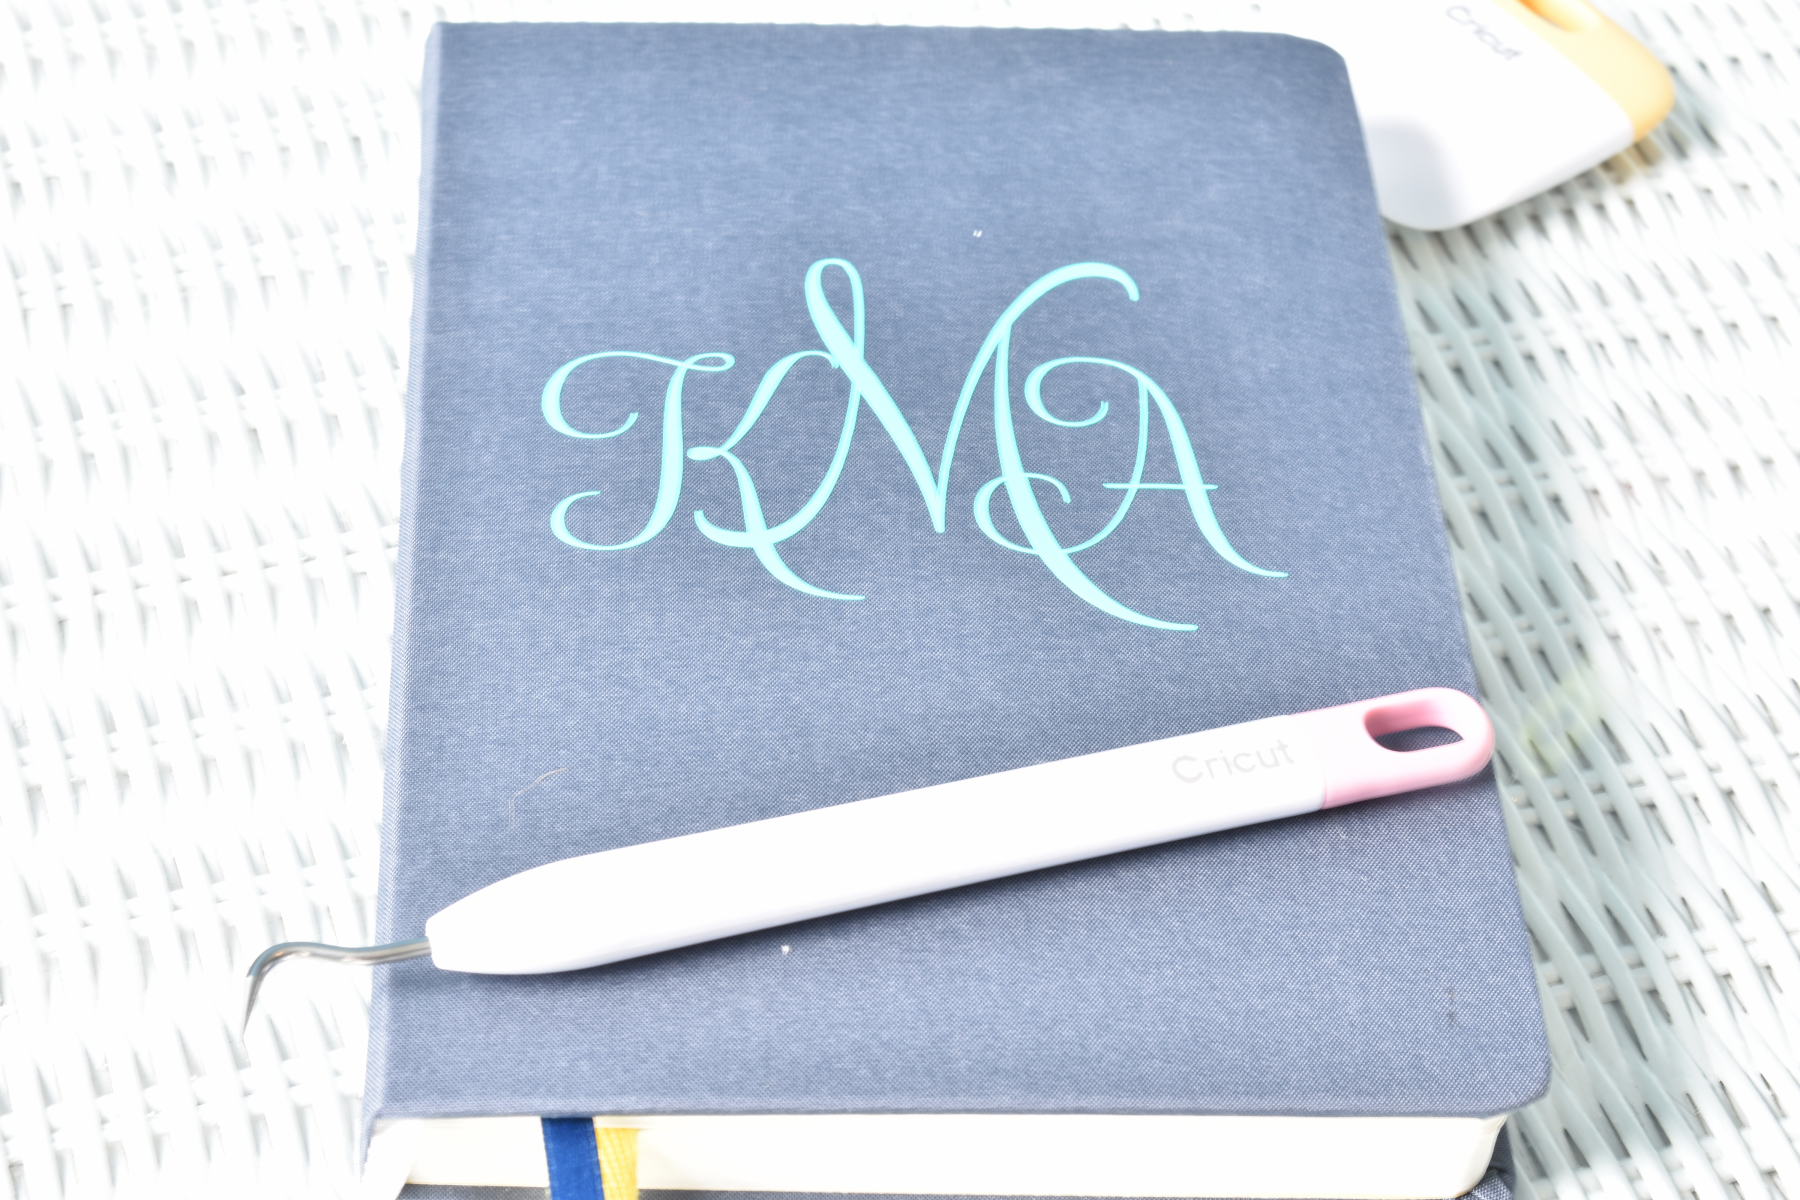
Sidenote: You’ll notice that the monogram in my screenshots looks different than my final product. I used a different font for the front of my planner (which I have a whole post about here) so that it would match my others and that font isn’t free. I used a font that you can get for free for my demonstration and I really like it better for monogramming anyway.
This post contains affiliate links. If you click on the link and buy something, I will receive a teensy commission. Rest assured that I will not recommend something that I would not use myself. For more information, please see my disclosure page.
Materials Needed for this Project:
Adhesive Vinyl. I get a lot of mine from Amazon

Vinyl Transfer Tape from Amazon

Cricut tools: weeding tool, scraper and scissors from Amazon

 Cricut cutting machine from Cricut
Design
- Open Cricut Design Space and add new project.
- Click Text from the tool bar on the left side of the screen.
- Type in your monogram: first initial, last initial, middle initial.
- Select what you’ve typed and choose a font from the Font Dialogue box at the top of the screen.
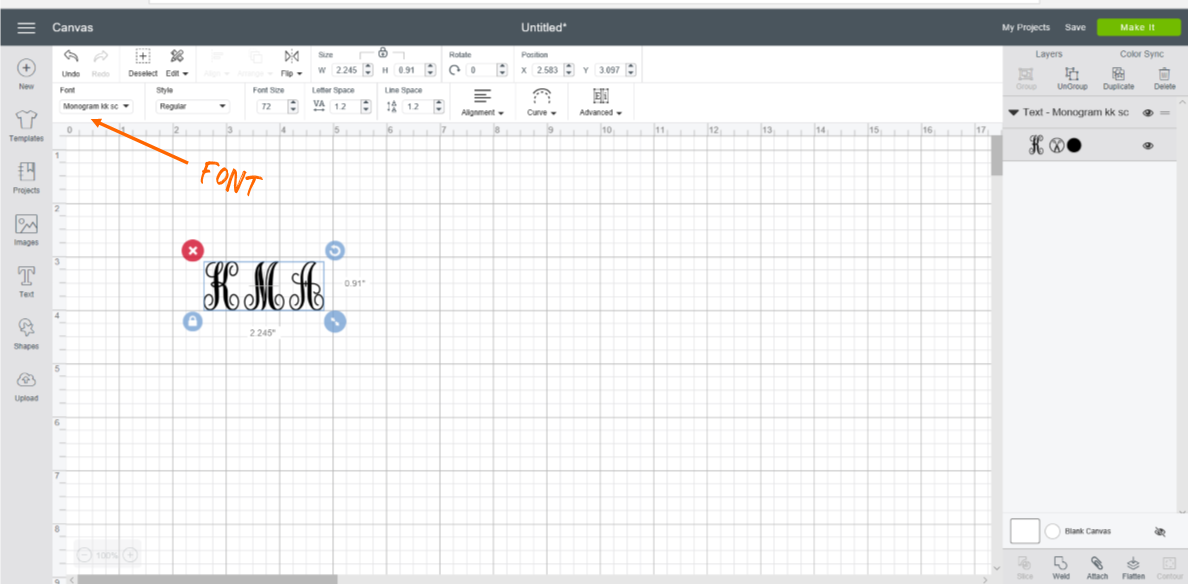
⊕PRO TIP: Get the Monogram kk sc font for free here.
- Click Ungroup at the top right of the screen under Layers.
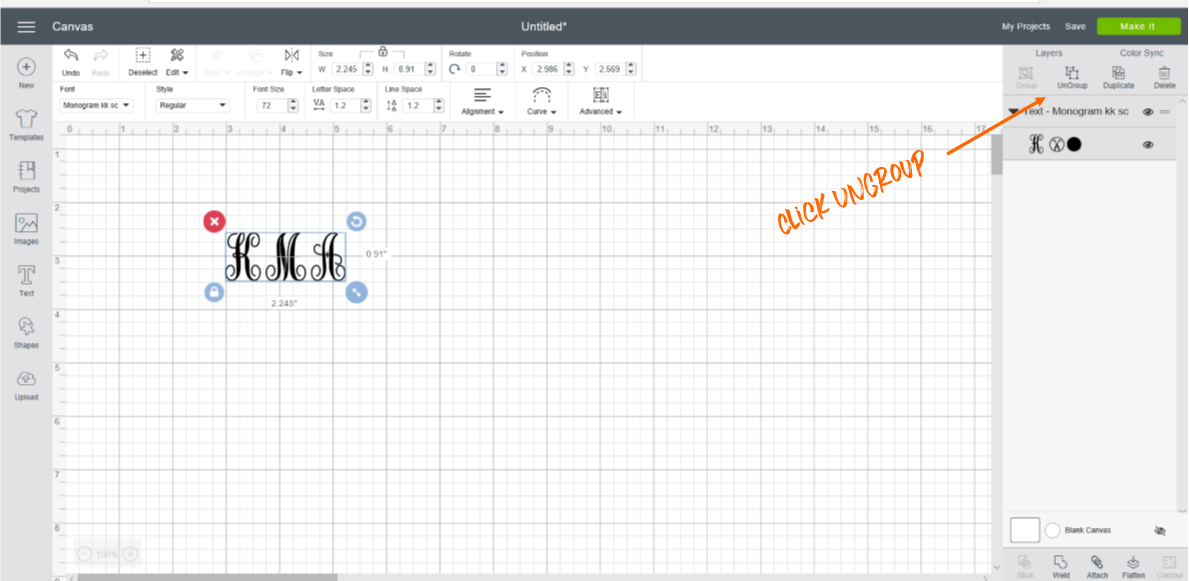
- Select the last initial (the one on the middle) and drag it to a new spot so you can work with it.
- Size the last initial. You can drag the corner to make it bigger or smaller, but I like to be more precise. With the letter selected, type the dimensions you want in the dialogue boxes under Size at the top of the screen.
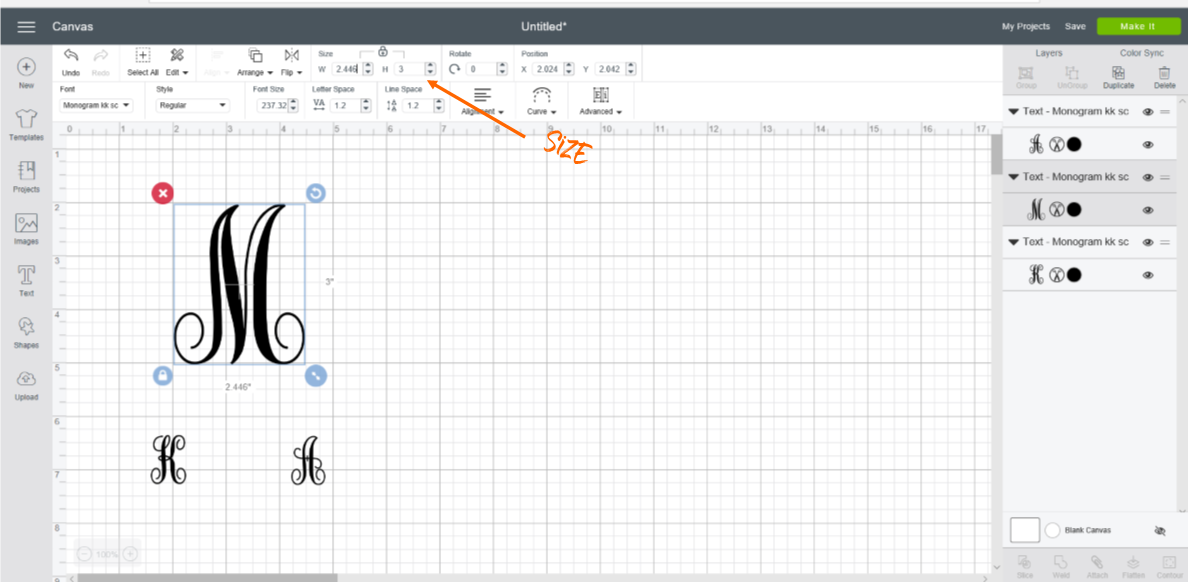
⊕PRO TIP: For small notebooks or tumblers, I like to make the last initial 3″ high and the first and middle initials 2″ high. A 2:3 ratio looks nice no matter the size.
- Click the first initial and size it. Drag it to the left side of the larger, last initial. When using a curly font, I like to overlap the tails of the letters so they appear intertwined.
- Click the middle initial and size it. Drag it to the right side of the last initial.
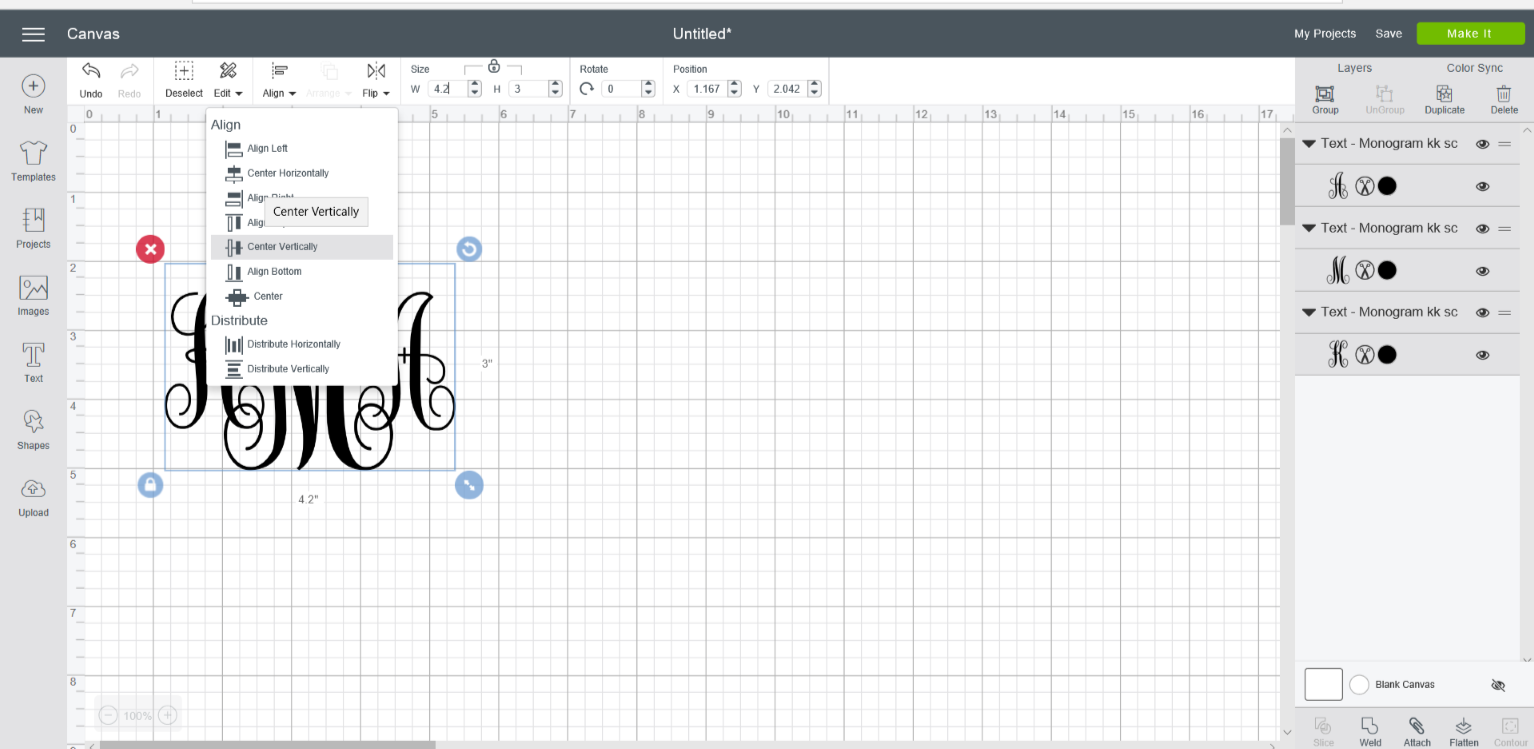
- Select all three letters and click Align at the top of the screen, then select Center Vertically. This will align the middle of all three letters.
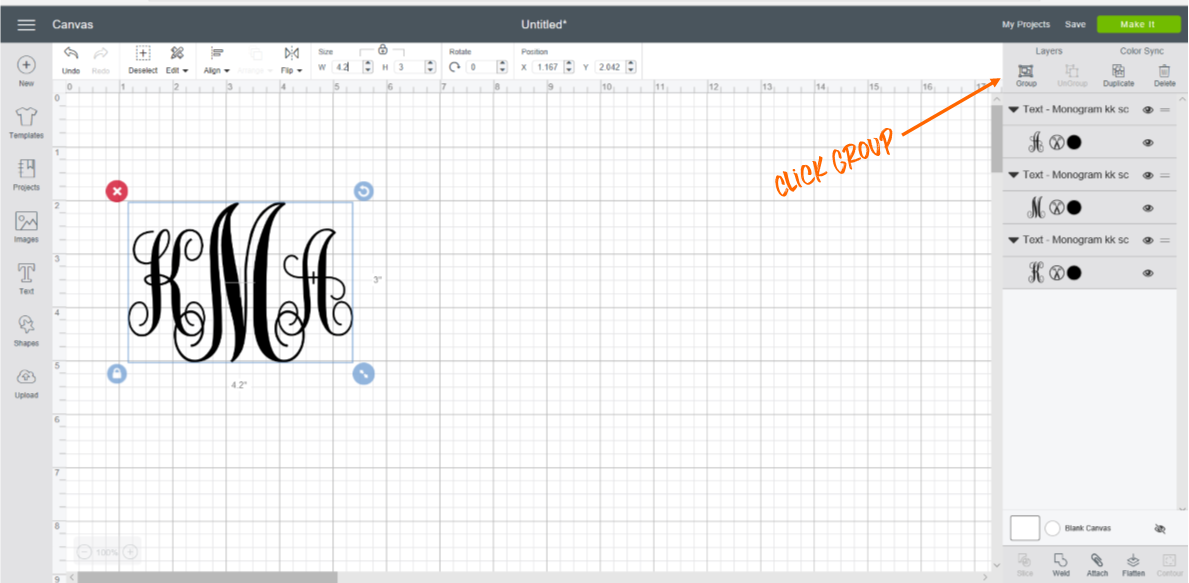
- Make sure you have each letter where you want it. Select all letters and click Group under Layers in the upper right corner of the screen.
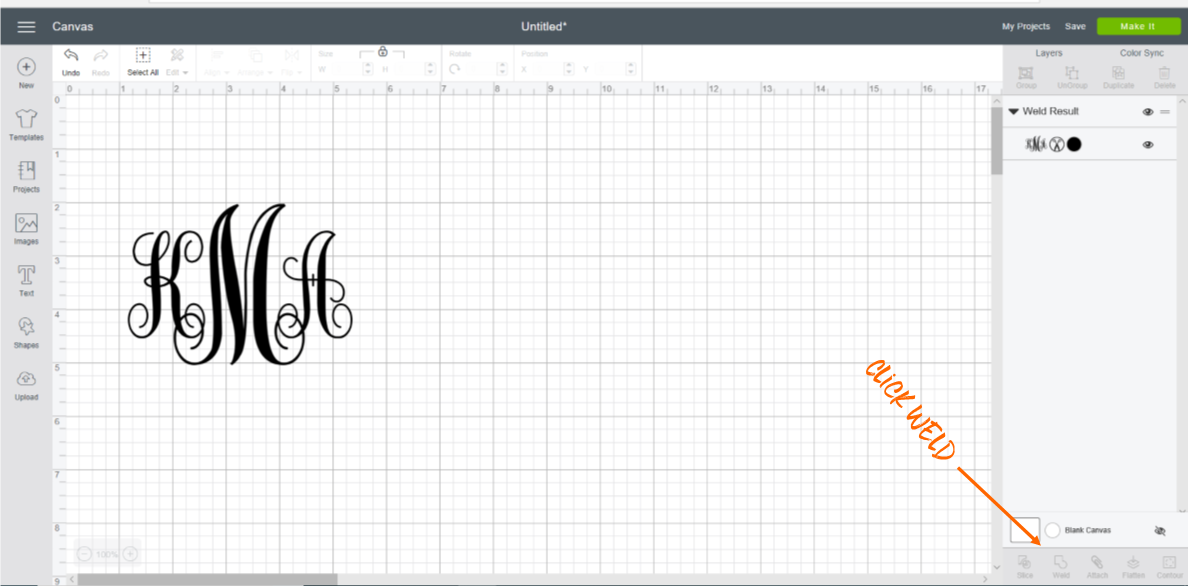
WARNING!!! The following step can’t be undone, so ensure that your monogram is exactly like you want it!
- With all of the letters still selected, click Weld at the bottom right corner.
Cutting
- Click Make It at the top right.
- Select Material Size. My monogram is about 5″ x 4″, so the closest thing is 6″ x 6″.
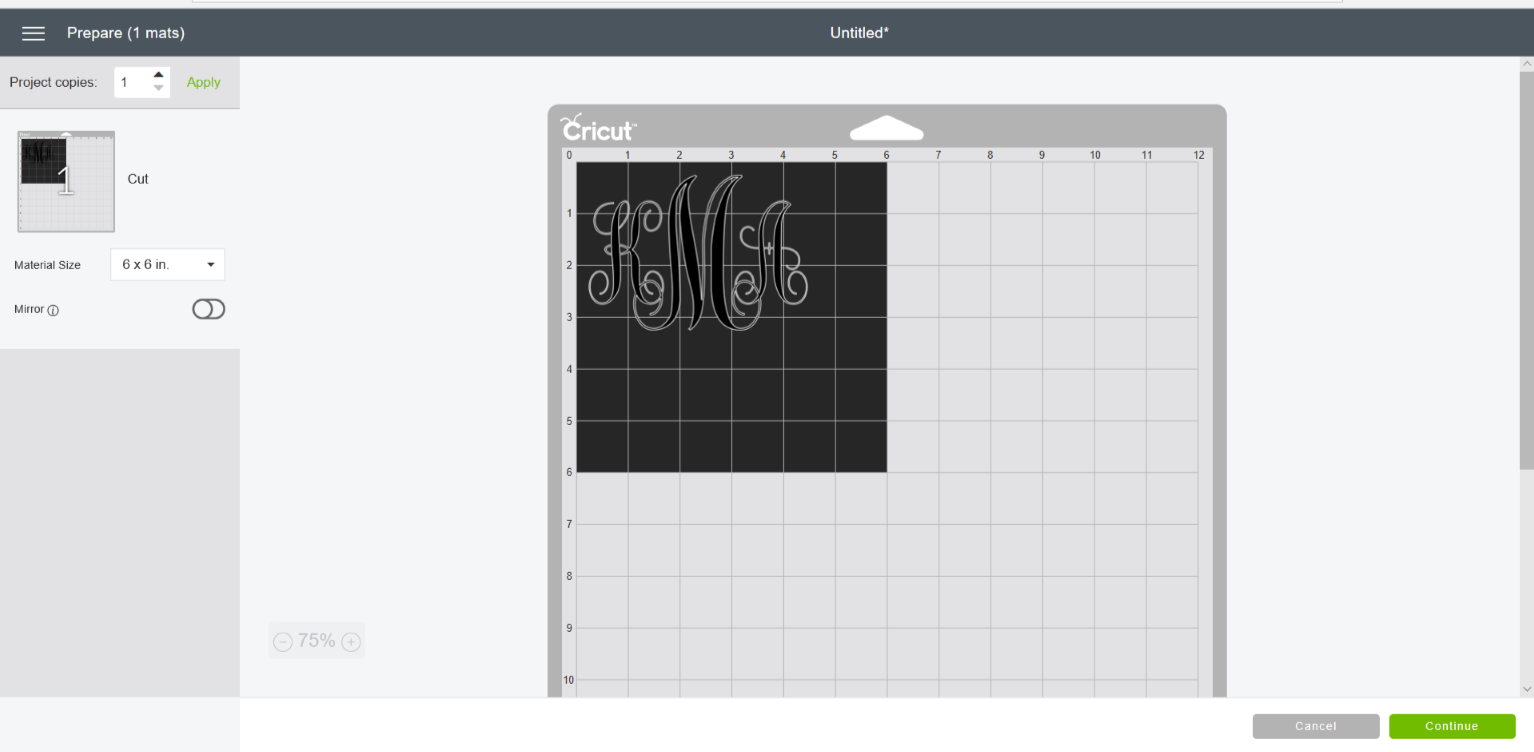
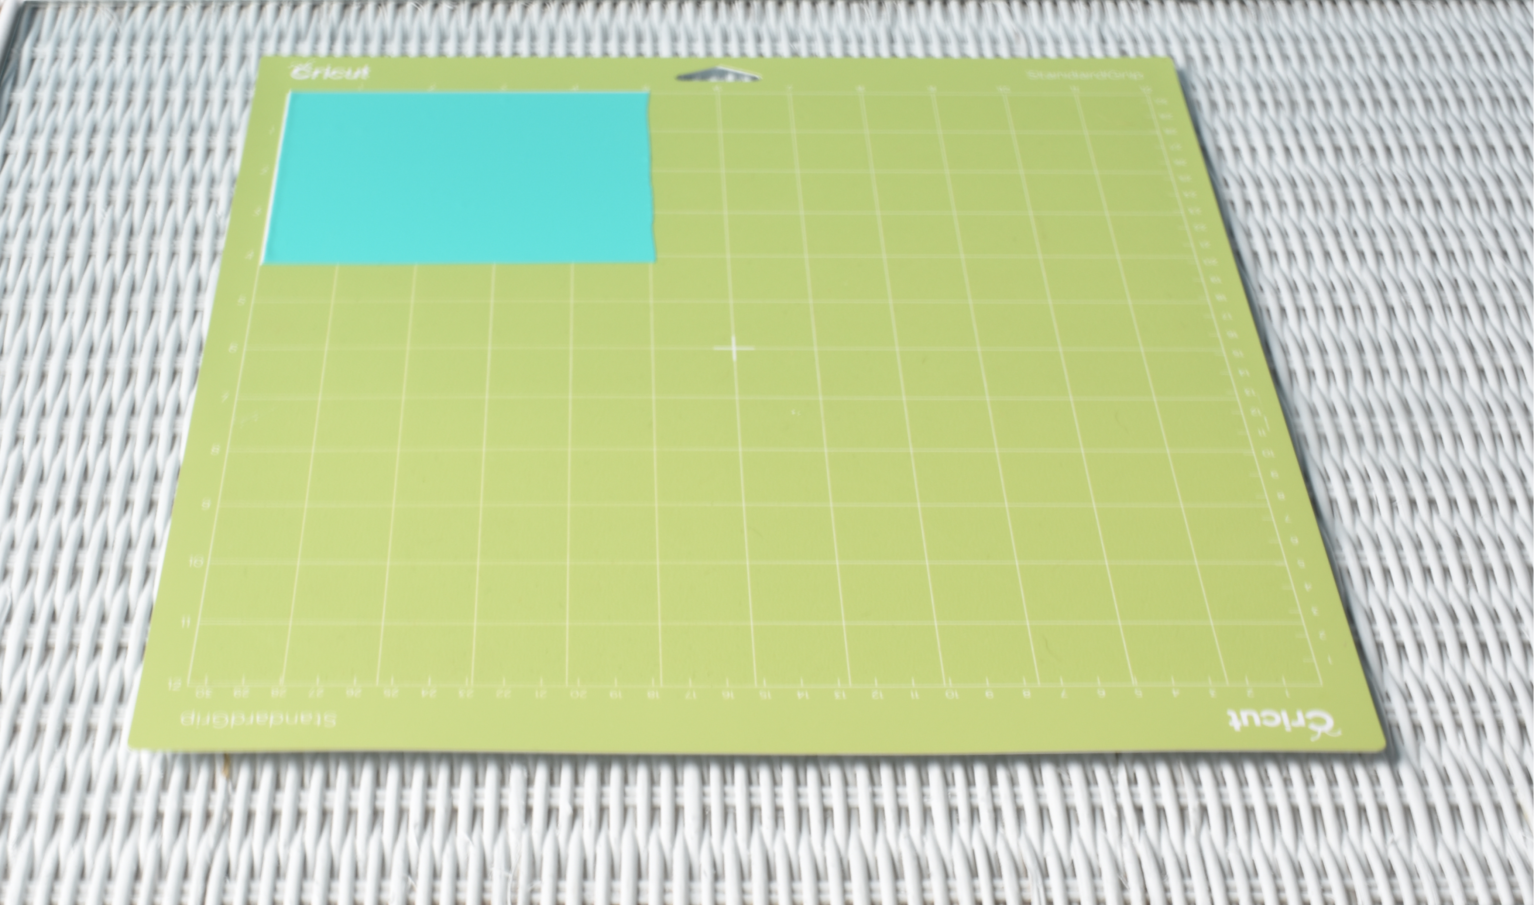
- Cut vinyl to the correct size and place it on the upper left corner of your cutting mat, shiny side up. Make sure it’s smooth.
- Click Continue.
- Select Vinyl on the Smart Set Dial on the Cricut. Make sure the Cricut is connected to your computer and plugged in. The screen should say, Material Set to Vinyl (even though mine doesn’t ’cause I took the screenshot before I changed it).
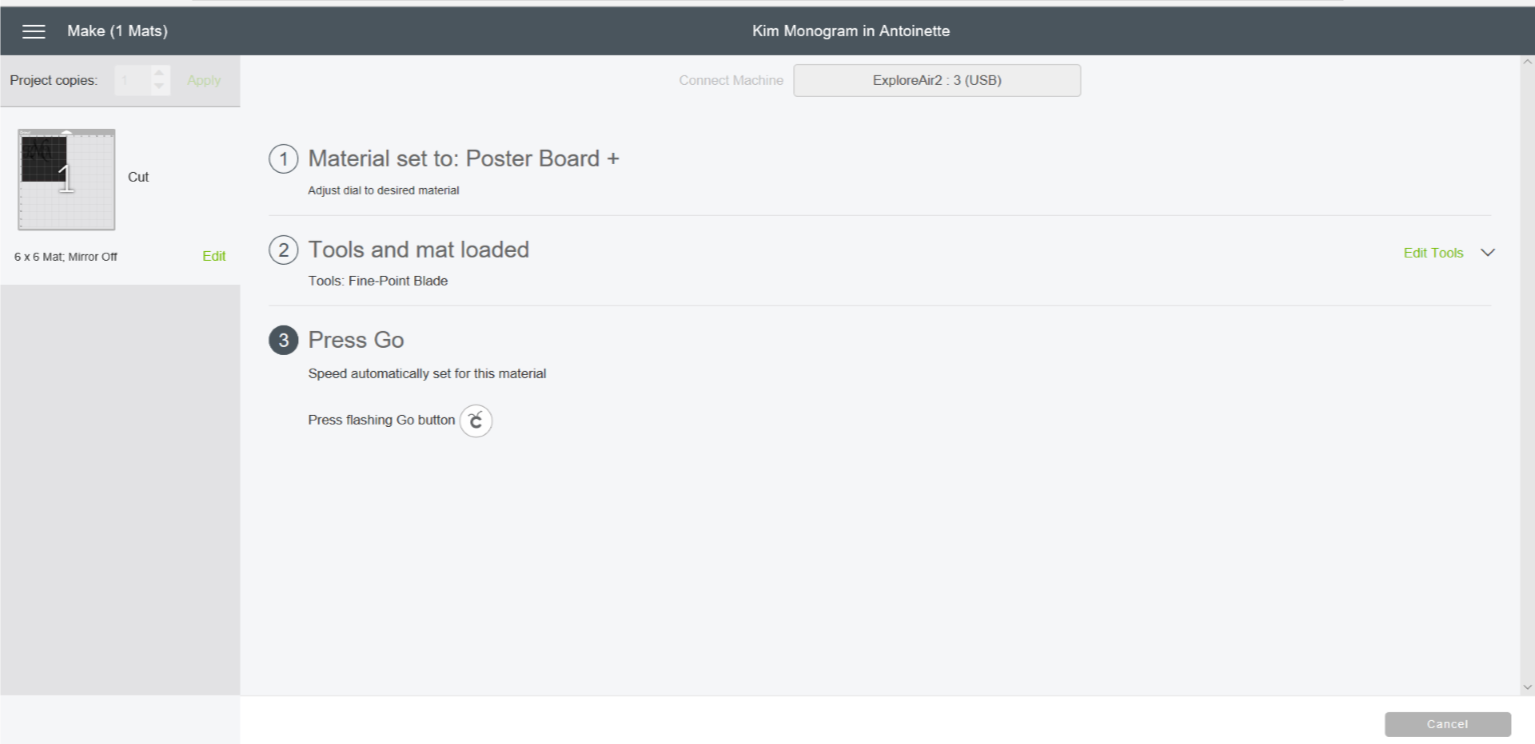
- Load the mat into the Cricut and press Go.
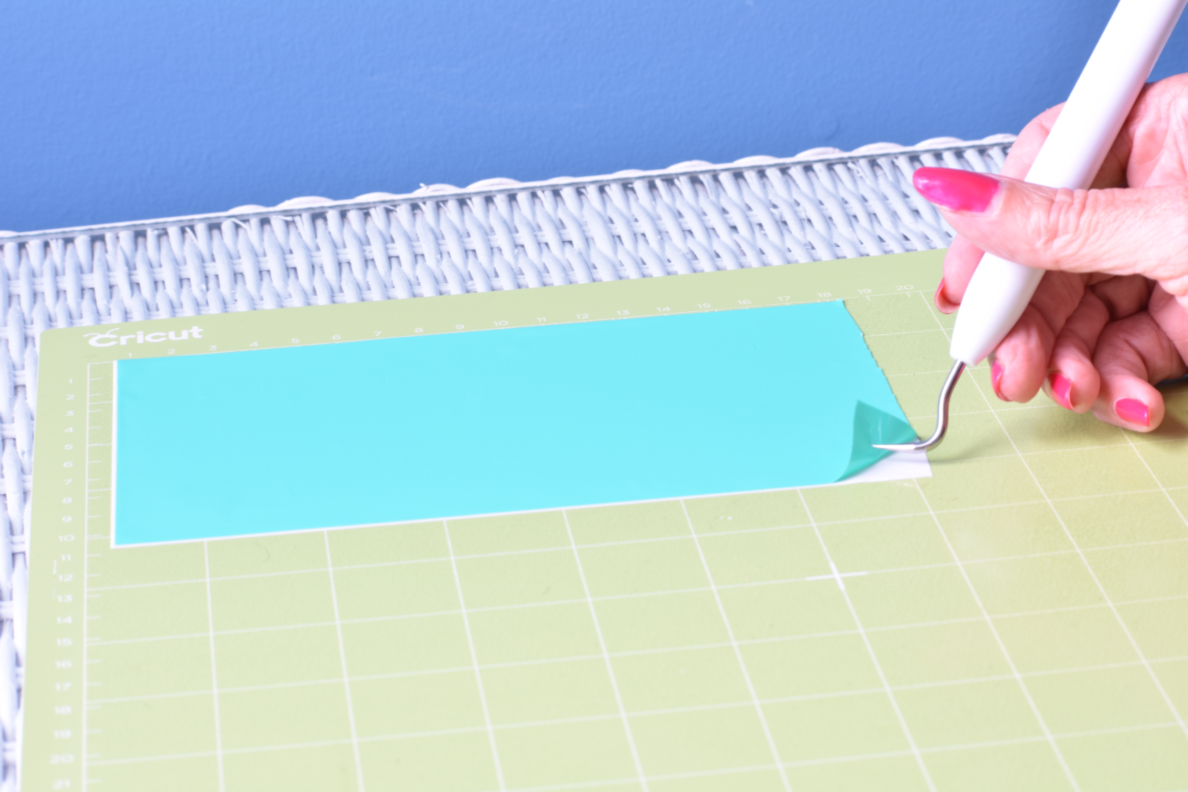
Weeding
- Weeding means removing the vinyl that you don’t want and leaving the image stuck to the mat.
- When Cricut is finished cutting, remove the cutting mat.
- With the weeding tool (the one with the pointy hook), gently remove the material around the design. Leave the design stuck to the mat. Make sure you get all of the tiny pieces.
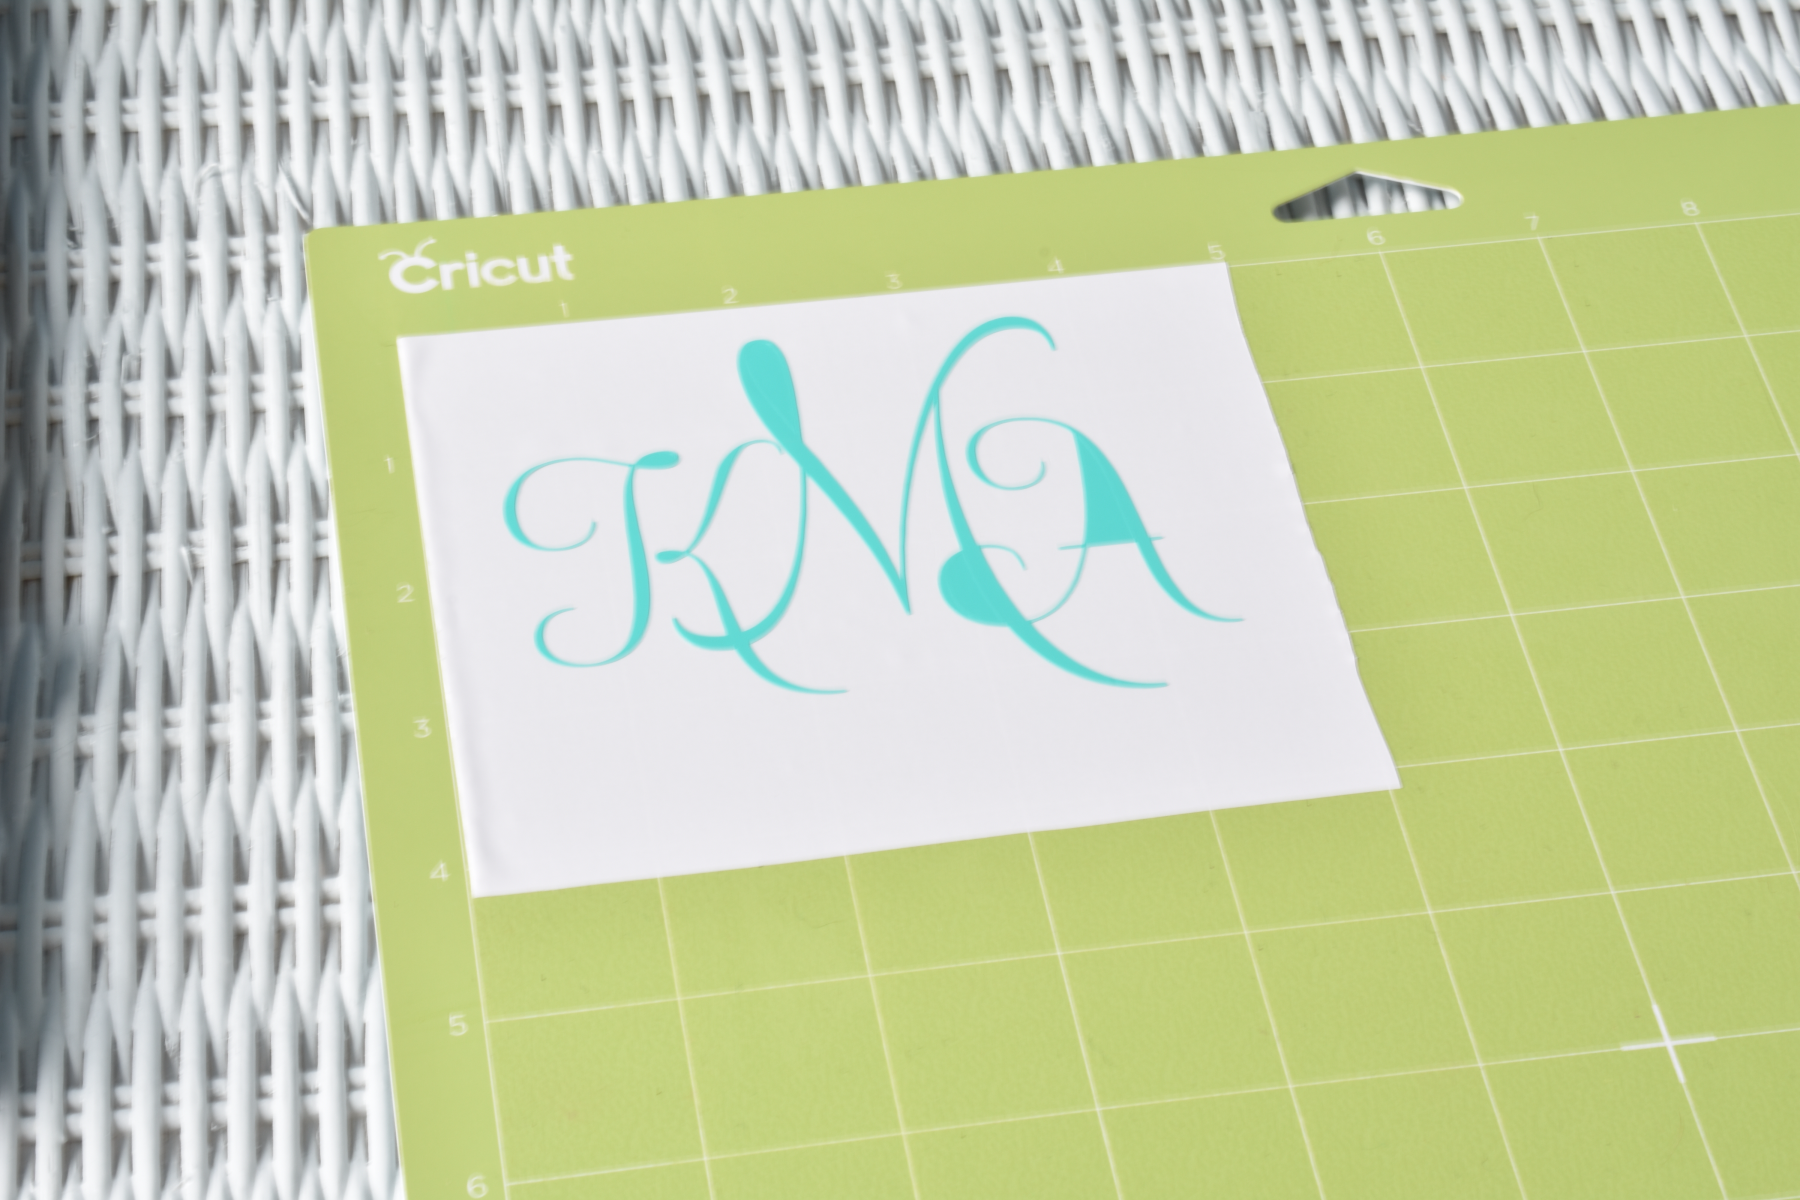
- Cut a piece of transfer tape. Remove the backing and stick it to your design. Use the scraper to make sure the entire design is stuck to the tape.
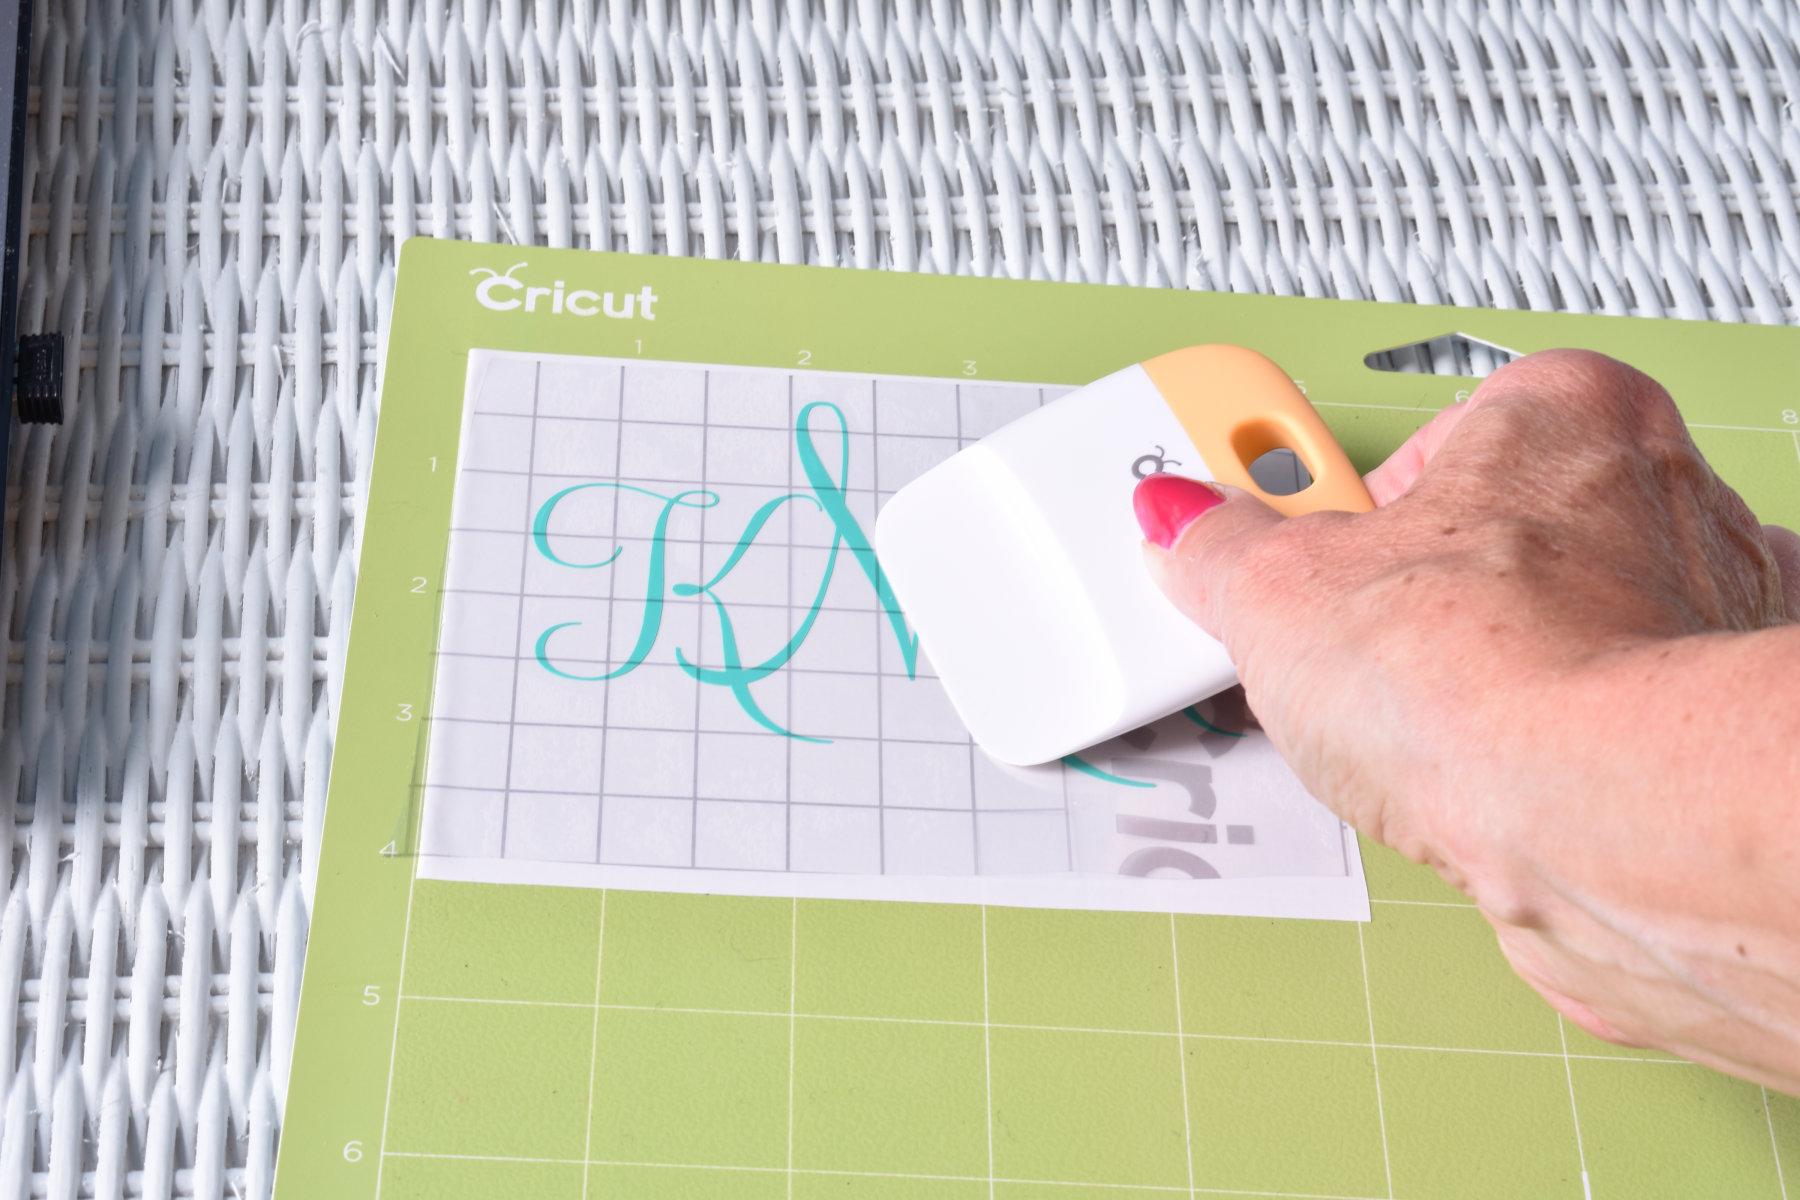
- Gently lift transfer tape.
⊕PRO TIP: Turn the mat over and peel the mat away from the tape so the tape won’t curl.
- You should have a monogram stuck to the clear tape now.
Application
- Clean the surface where you will apply the monogram and dry with a lint-free cloth.
- Use the lines on the tape to help you position the monogram on the surface. Press the middle down first, smoothing each side away from the middle.
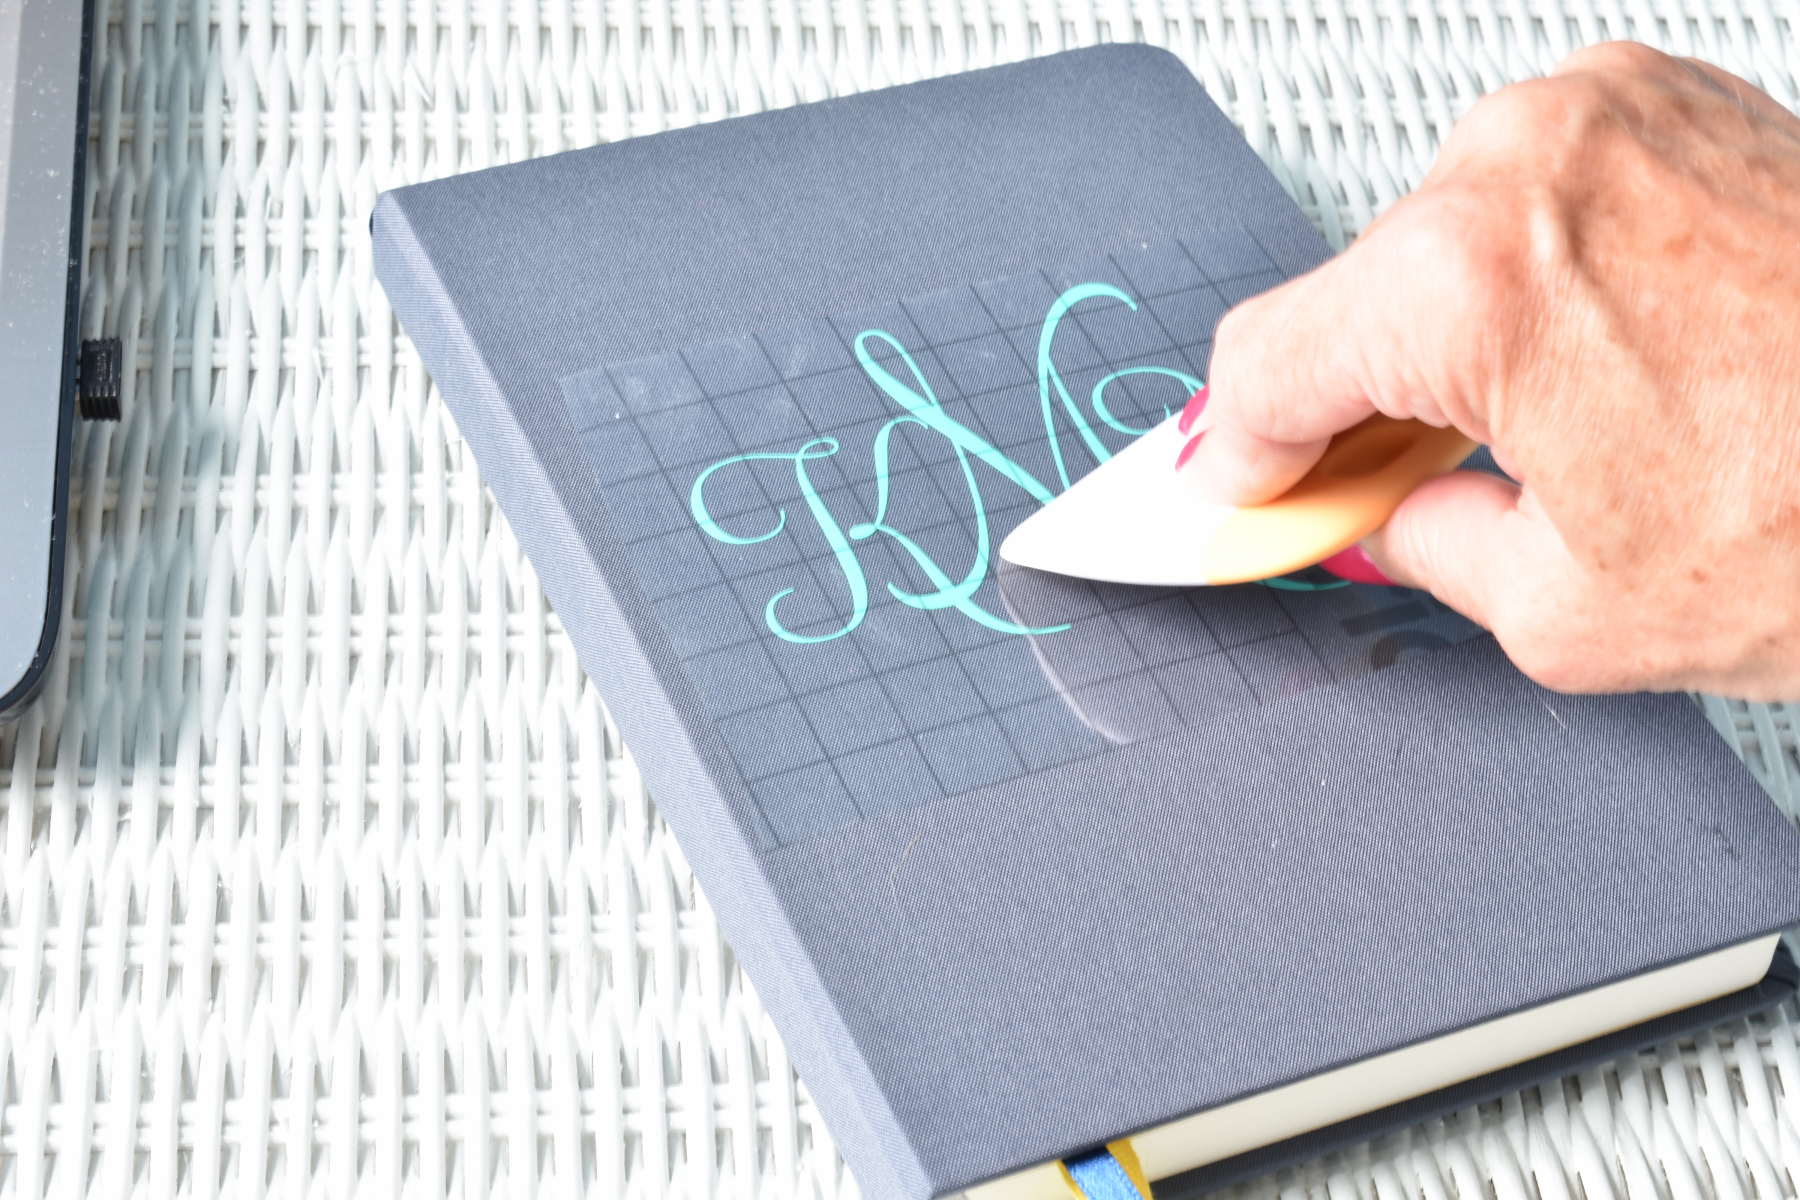
- Go over the design firmly with the scraper to make sure the monogram is adhered to the surface.
- Gently peel away the tape. If any of the design starts to come up with the tape, just stop and stick it back down carefully. You can use the tip of the weeding tool to pull it away from the tape and press it on the surface. If you miss a teensy piece of vinyl like I did inside of the “K,” don’t worry. You can go back and pick it out like I did after I saw this photo!
Ta dah! You have something personalized and pretty! Give it about 24 hours to set the adhesive. If you’re just using regular vinyl, things won’t really be dishwasher-safe, so hand wash tumblers, etc. They also aren’t fidget-safe if you have a picker…
Back to School is when you can really use a few good monograms! Stay tuned for more pretty things! How are you going to use monograms with Cricut?

Great tutorial, Kim… Someday, I will get one of these cutting machines! (Loved your tip about sunscreening your kids, too!)
Thanks, Julie! I love my Cricut but I haven’t used it nearly as much as I would like. There are just so many things you can do!
Great info, Thank You
Your tutorial is amazing and helped me tremendously! I love the font you used on your journal, but can’t find the name of it. Would you let me know what it’s called please?
Carolyn
Hey, Carolyn! I used Antoinetta. This is a font I own, it’s not on Cricut Design Space. Sorry:(
Thanks for reading!
Kim Mayo recently posted…How to Make the Best Baked Potato Sauce Ever!
Good morning !! Thank you so very much , I’m a newbie to Cricut ,just got the Cricut maker for my birthday a few days ago ; but I don’t know anything about it( I just wanted this machine so badly ). I’m trying to find tutorials ,( not easy ) so I can learn and start making something , maybe I can start a little Bussiness some day! I love that you explained so well that I became brave enough to order some materials and I’ll try to make something ! Again thank you so very much I really appreciated your help , have a blessing day !
Hi
Thank you For Sharing it.
Such an amazing piece of information you have shared mam. Keep sharing such things.
This is such a well researched piece! I was working on a page for my site on “how to teach kids to weld” and came across this post. I love the idea that you introduce them to other metal work first, because obviously welding is too dangerous to teach at a young age.
I love me some welding but yes, probably not appropriate until kids are much, much older I loved researching other projects to introduce kids to metal!
What you thing about ram. Its only a temporary memory that can store temporary data.
lili recently posted…Best RAM For Ryzen 9 5900X
WOW this is really too good about the monograms with circuit thanks shirting this article
tom recently posted…Best Keyboard Position For Gaming
Anchor Text:THE QUALITY OF YOURBEST KEYBOARD IS VERY GOOD.I AM SATISFIED WITH YOU SERVICE
Thanks for nice sharing about keyboards and others Keep sharing such things!
Airline Commander MOD APK is a very interesting game. For the MOD APK version, you must uninstall the Airline Commander original version. Then you can download Airline Commander MOD APK from our website.
I love me some welding but yes, probably not appropriate until kids are much, much older I loved researching other projects to introduce kids to metal!
cam recently posted…Skills That You Can Learn In The Real Estate Market
I love to write about technology so I started my own website you can check here
Probably not appropriate until kids are much, much older I loved researching other projects to introduce kids to metal!
Have you been injured in a Train Accident Attorney in Washington DC? If so, a lawyer for a train accident lawsuit in Washington can definitely help you to get compensation. We’re an experienced network that connects with professionals lawyers who are ready to fight for your rights and Get You The Compensation that you deserve. You don’t have to go through this alone, we want to be there with you every step of the way.
You really shared amazing guide to choose the best food to maintain the figure. I really enjoy this reading. Thank you for sharing this article.
JASON ROY recently posted…Uk49s Lunchtime Prediction 28 June 2022 – Official
Please make a monogram for new year wishes 2023. So that every one will send some best new year wishes to friends with some beautiful crafts and to be remembered.
I really appreciate reading such kinds of blogs. Thanks for sharing such informative articles
Read More